Publishing from Google Docs to Blogger should be simple. Write your post, export it, done. Instead, most people end up pasting content into Blogger’s editor and spending the next 20 minutes cleaning up double line breaks, broken image paths, and font styles that won’t behave.
This guide covers how to do it properly using Tenwrite — a publishing tool built specifically for moving content from Google Docs to Blogger and WordPress. We’ll walk through the full export process step by step, then show you how to skip the manual export entirely with Drive Automation.
Why Copy-Pasting from Google Docs to Blogger Breaks Your Posts
Before we get into the solution, it helps to understand why the problem exists in the first place.
Google Docs wraps almost everything — paragraphs, headings, inline text — in style attributes that carry font families, font sizes, line heights, and margins. When you paste into Blogger’s editor, those styles come with it. Your post looks fine in draft mode but renders inconsistently across different browsers and screen sizes.
Images cause a separate problem. Pasting from Docs leaves images as references to Google’s internal servers rather than files properly hosted for a blog. These references can break or become unavailable over time.
Then there’s the structural noise: double <br> tags for paragraph spacing, nested <span> elements, non-breaking spaces, and other artifacts that accumulate invisibly and make the HTML harder to maintain.
Tenwrite handles all of this before the content ever reaches Blogger. It converts the document to clean HTML, applies configurable cleanup rules to remove the style noise, hosts your images on a proper CDN, and sends a polished post to Blogger.
What You Need Before You Start
- A Google account
- A Blogger blog (it can be an existing blog or a new test blog)
- Tenwrite — available as a Google Docs add-on from the Google Workspace Marketplace, or via the web dashboard at app.tenwrite.com
If you haven’t linked your Blogger account to Tenwrite yet, follow the Connect Your Blogger Blogs guide first. It’s a one-time OAuth step and takes about two minutes.
How to Publish a Google Doc to Blogger
Tenwrite is available in two places: the Google Docs add-on (accessible from the Extensions menu inside any Google Doc) and the standalone web dashboard at app.tenwrite.com. Both share the same interface and features — use whichever is more convenient for your workflow.
Step 1 — Open the Export Form
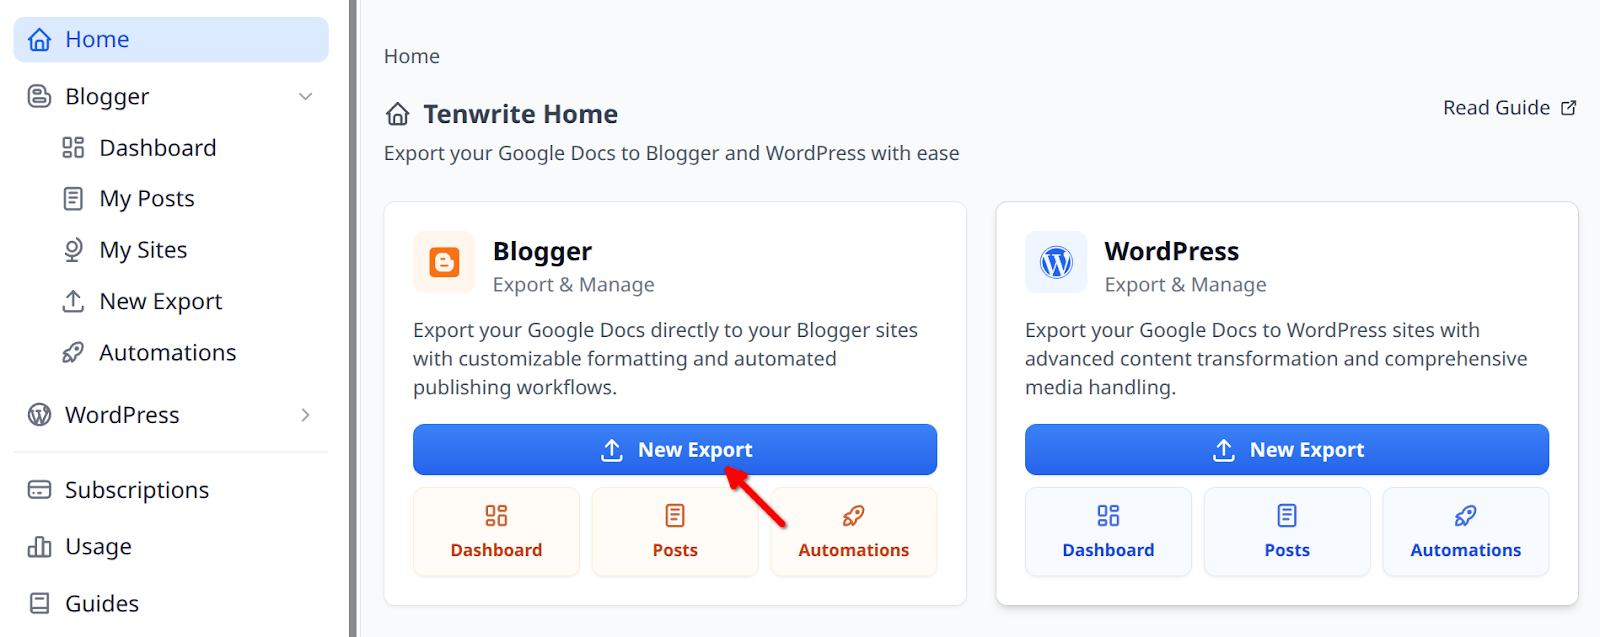
In the add-on or web dashboard, click Blogger > New Export.
Step 2 — Choose Post or Page
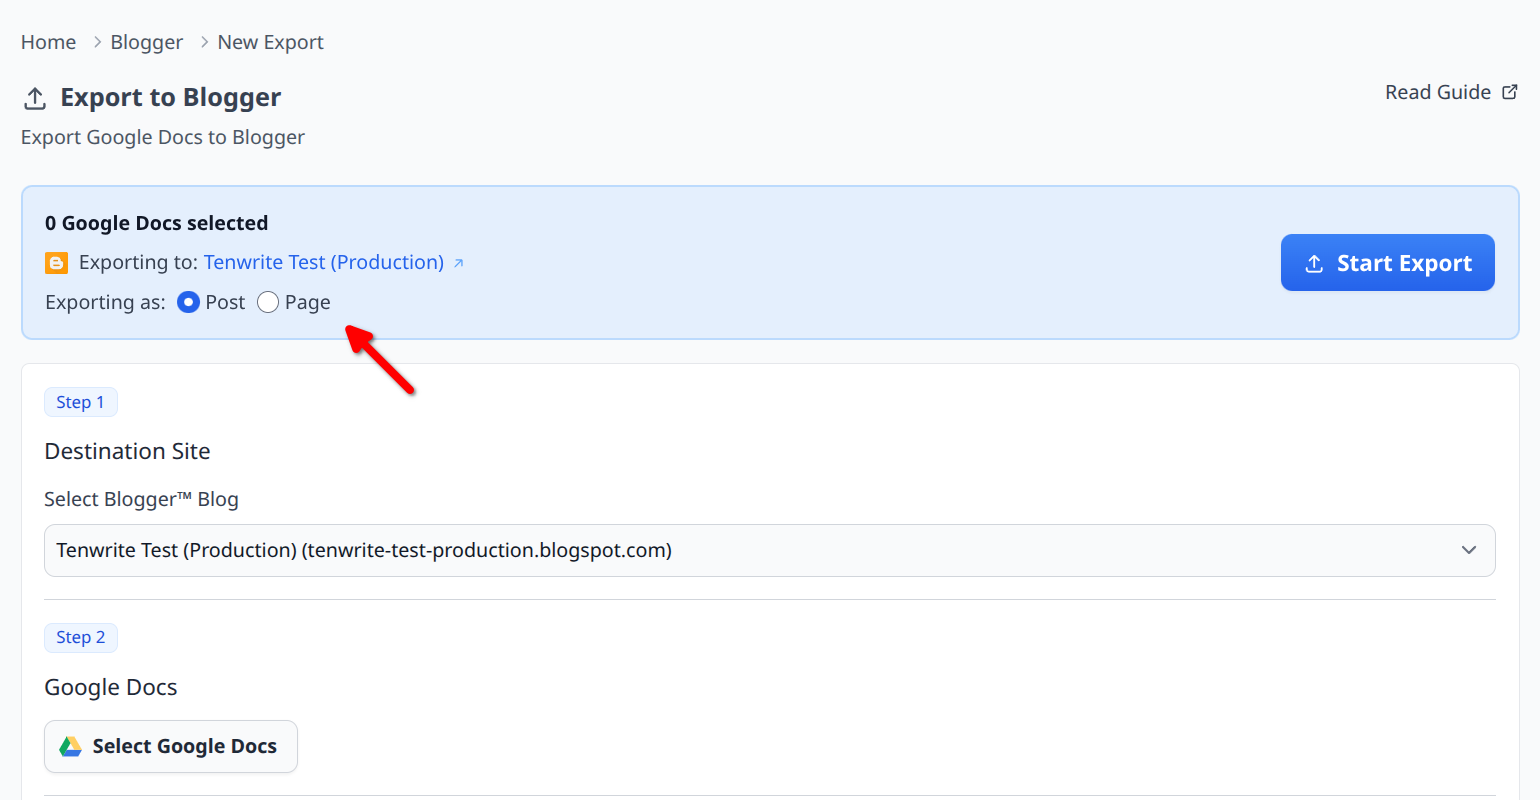
At the top of the form, select whether this export should create a Post (standard blog content) or a Page (standalone static content). You can change this at any point before starting the export.
Step 3 — Select Your Destination Blog
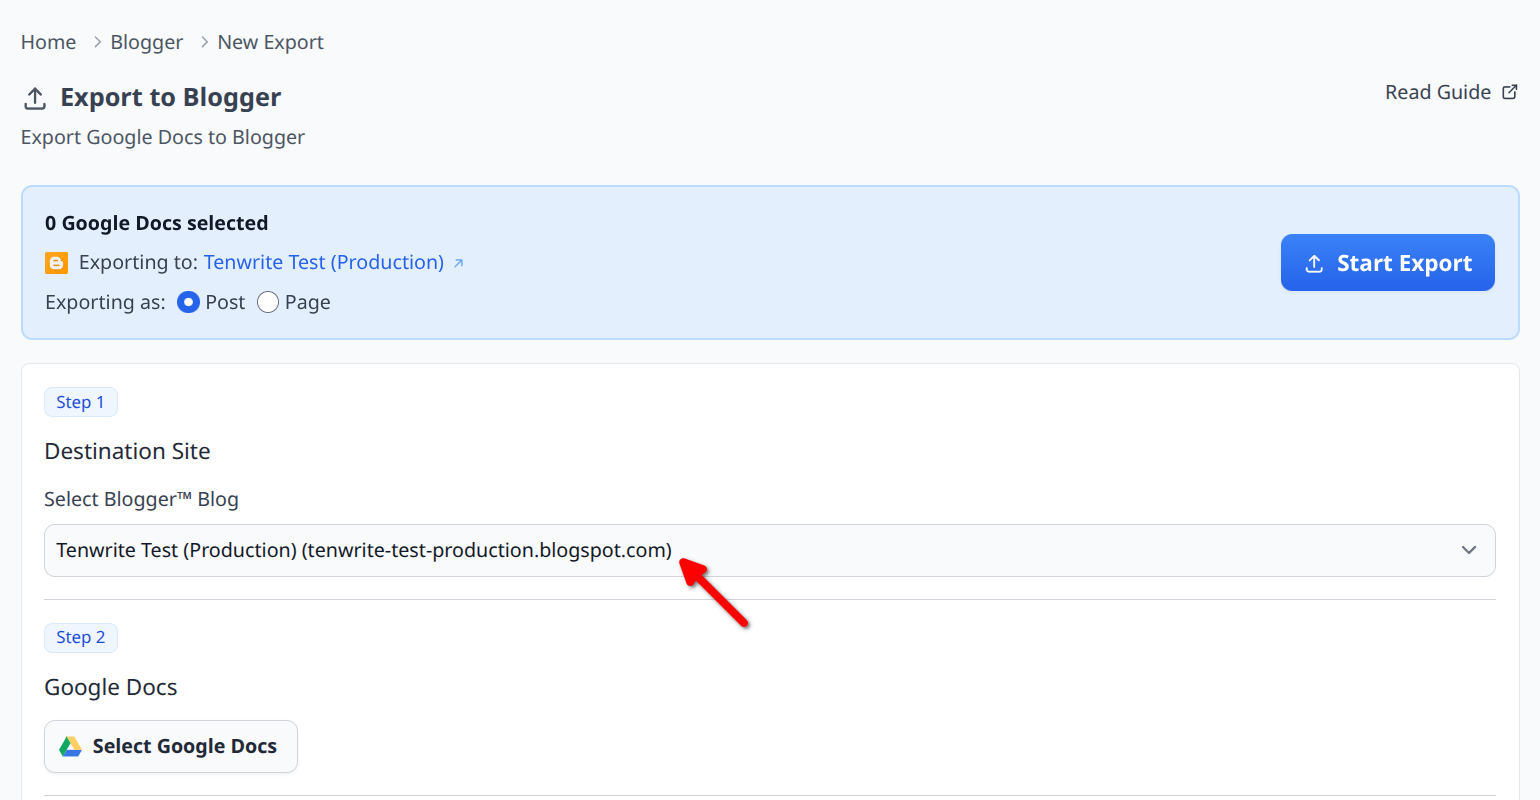
Pick the Blogger blog you want to publish to. If you manage multiple blogs, they all appear in the dropdown. Your selection applies to every document in the current export batch.
Step 4 — Add Your Google Docs
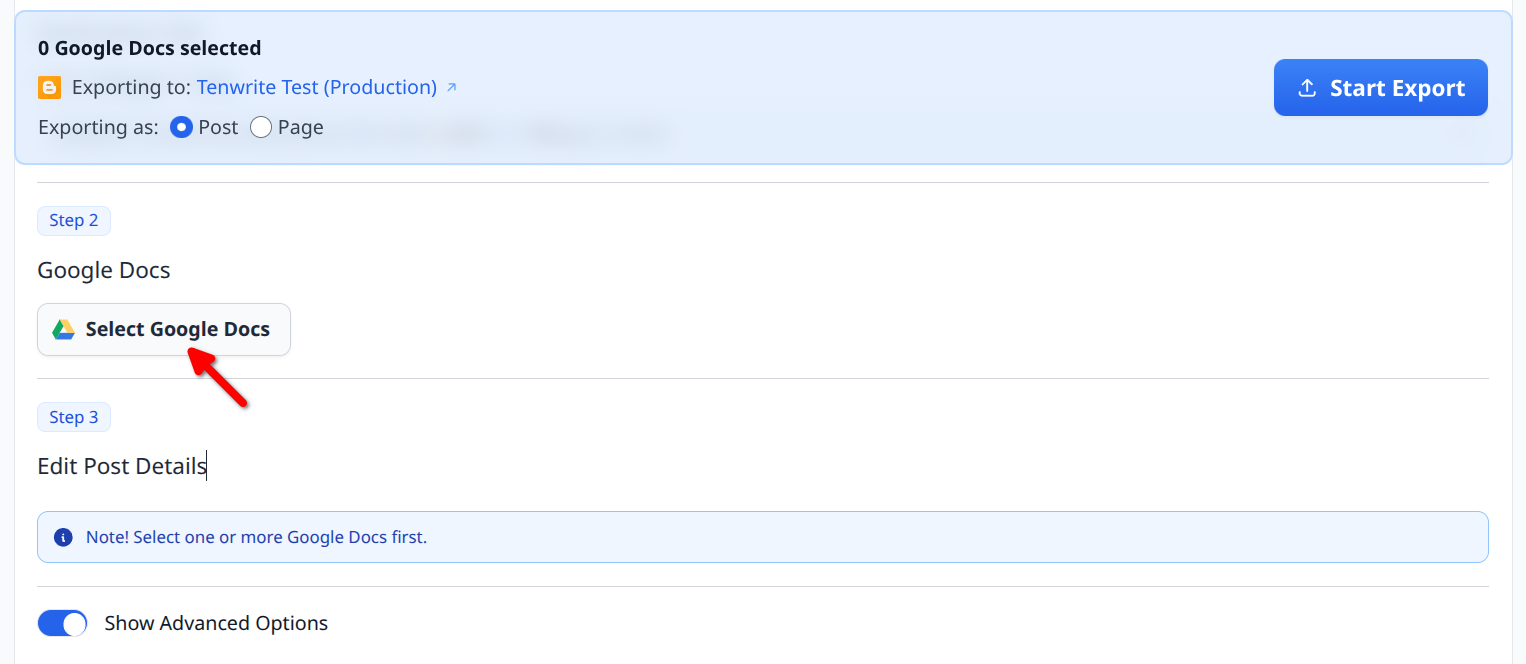
Click Select Google Docs to open the built-in Google Drive picker. Select one or more documents and click Select to add them to the export list. You can select a single doc or build a batch.
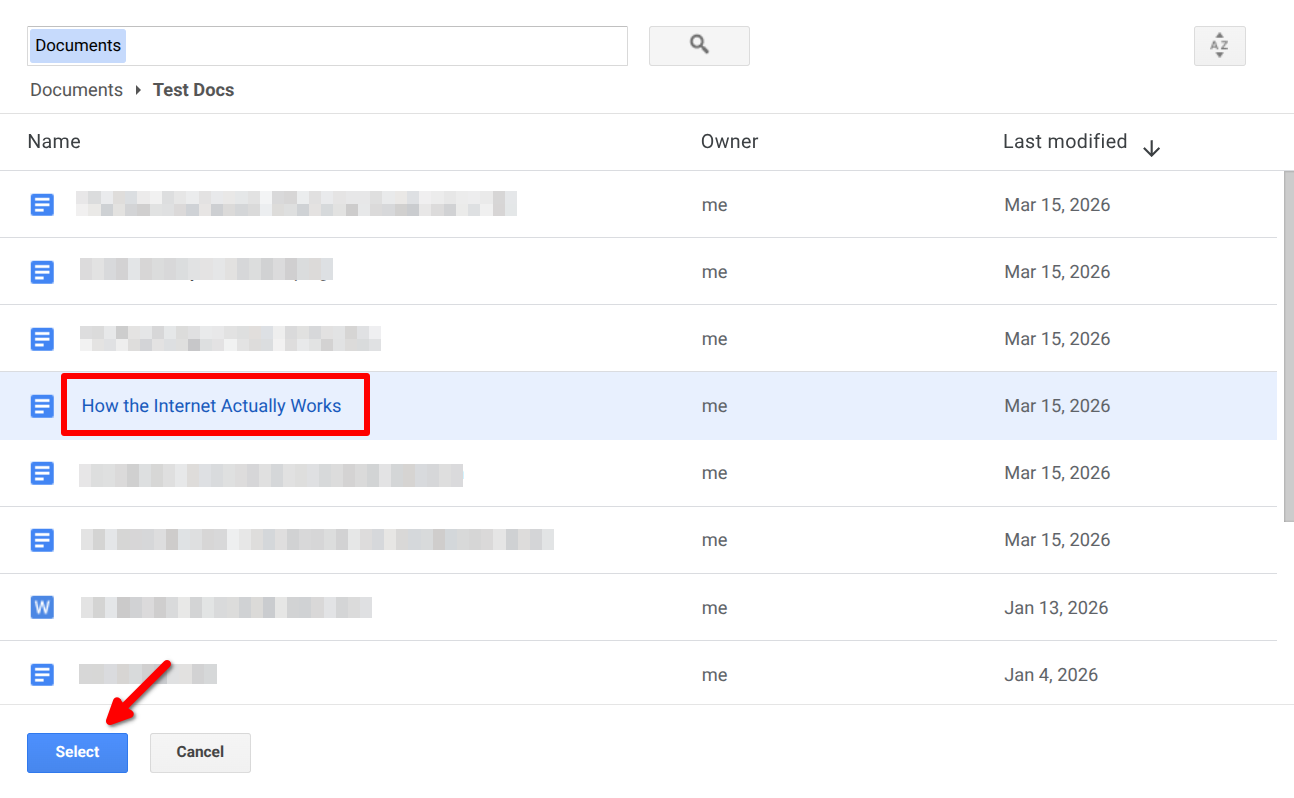
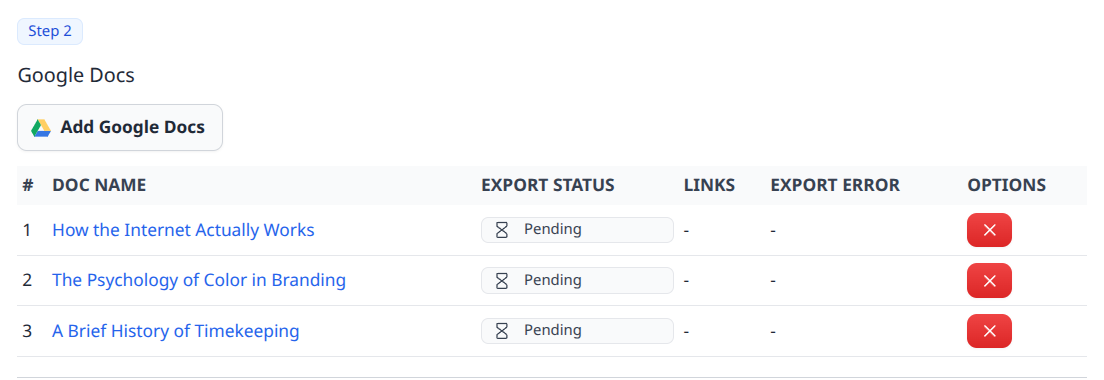
Once added, your documents appear in a table below the picker. Click Add Google Docs to include more, or use the remove button on any row to drop a file from the batch.
Note: Only Google Docs are supported. If your content is in a .docx or Word file, open it in Google Docs first and use File > Save as Google Docs, then select the converted file here.
Step 5 — Set Post Details
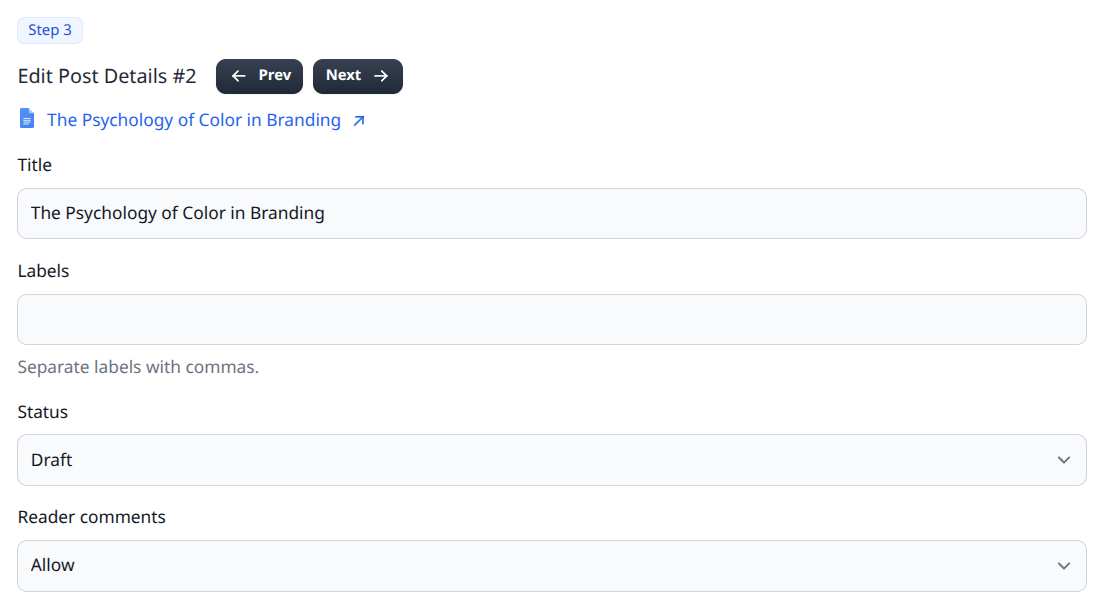
For each document, fill in the post metadata. If you added multiple documents, use the Prev and Next buttons to step through them individually.
For every document you can set:
- Title (required)
- Labels — comma-separated, e.g. tutorial, productivity, google docs
- Status — Draft, Publish, or Scheduled
- Publish Date — appears when Status is set to Scheduled
- Reader comments — Allow, Do not allow; show existing, or Do not allow; hide existing
Step 6 — Advanced Formatting (Optional)
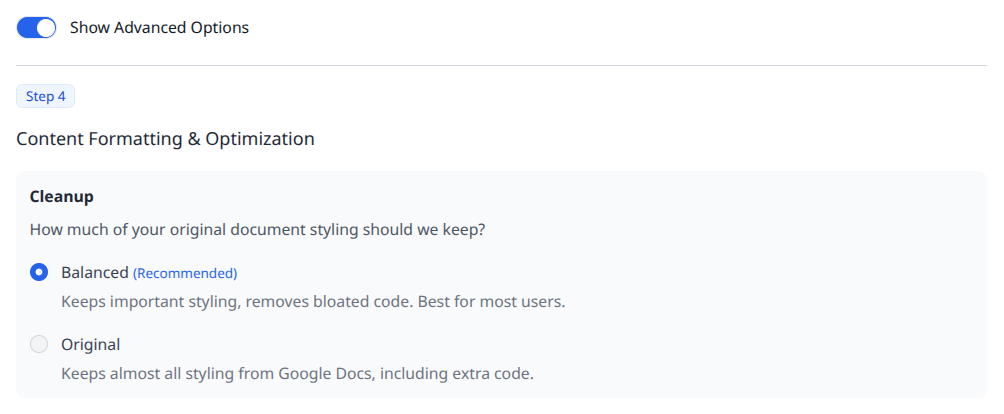
For most exports, you can skip this section entirely and go straight to Step 7. If you want more control over how the content is processed, click Show Advanced Options to open the formatting controls.
The key setting is Cleanup:
- Balanced (recommended) — strips unnecessary markup from Google Docs while keeping meaningful formatting like headings, bold text, lists, and tables.
- Original — preserves more of Google Docs’ original inline styling, if you specifically need it.
You can also configure individual content transformations: responsive images, YouTube link-to-embed conversion, heading demotion, link behavior (rel=”nofollow”, target=”_blank”), and more.
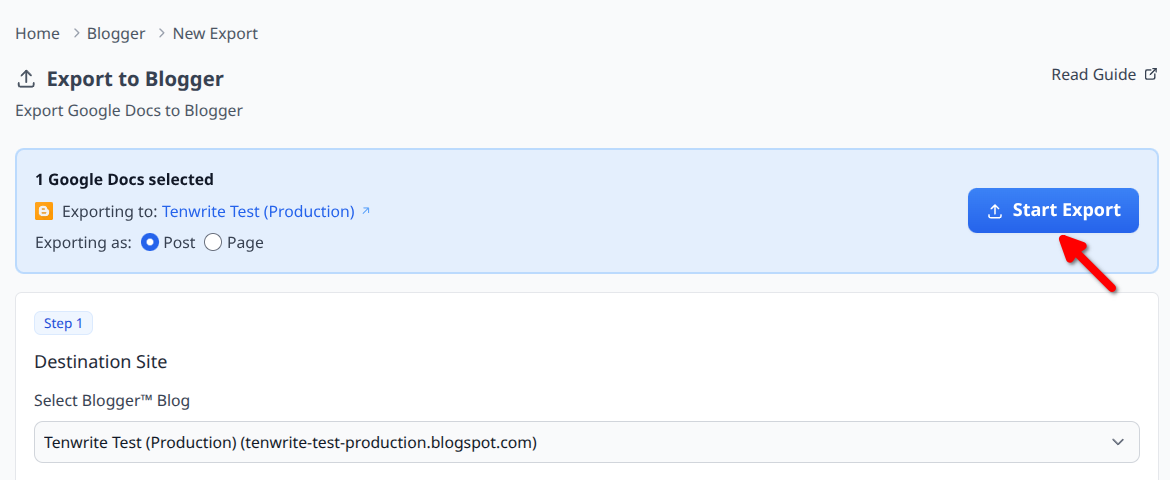
Step 7 — Start the Export
Check that the header shows the correct document count, destination blog, and export type (Post or Page). Then click Start Export.
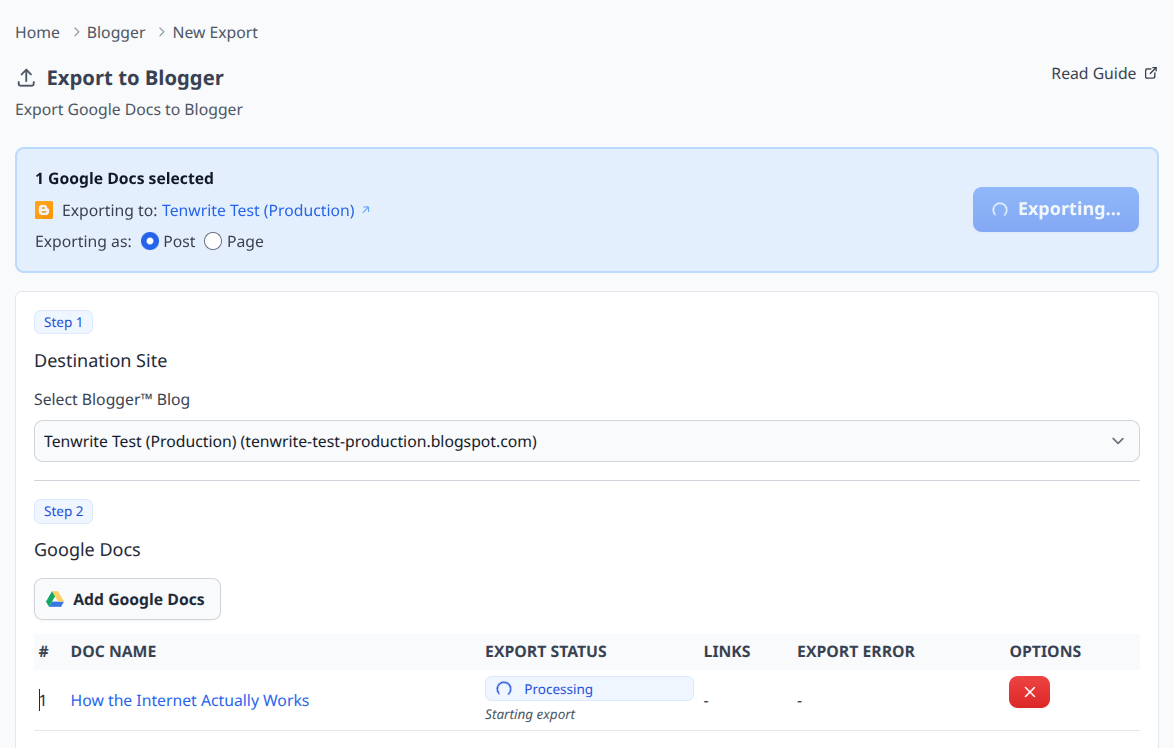
Tenwrite processes each document and tracks its status in real time: Pending, Processing, Success, or Error.
When a document finishes successfully, you’ll see a confirmation toast and Edit and Preview links appear in that row.
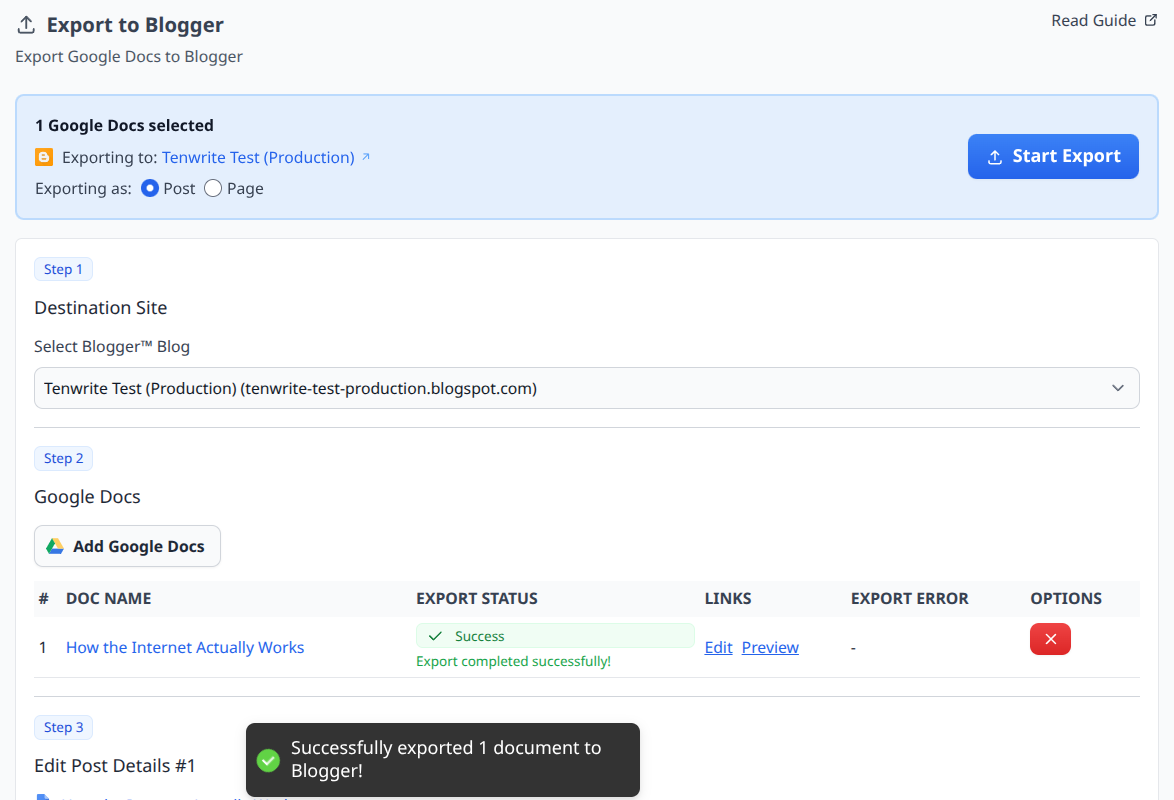
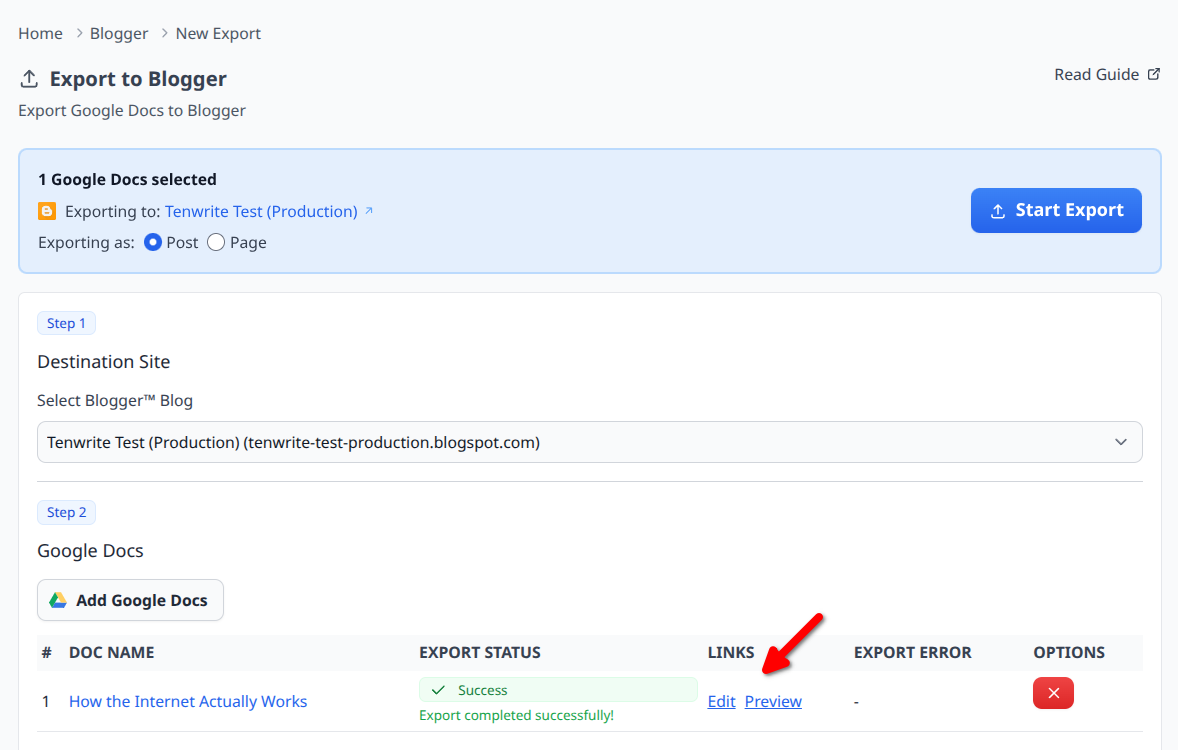
Click Preview to view the live post on Blogger. Click Edit to open it in Blogger’s editor for any final adjustments before sharing it.
Skip the Manual Step: Drive Automation
If you publish content on a regular schedule, running the export form every time adds overhead. Drive Automation removes the manual step entirely.
Here’s how it works:
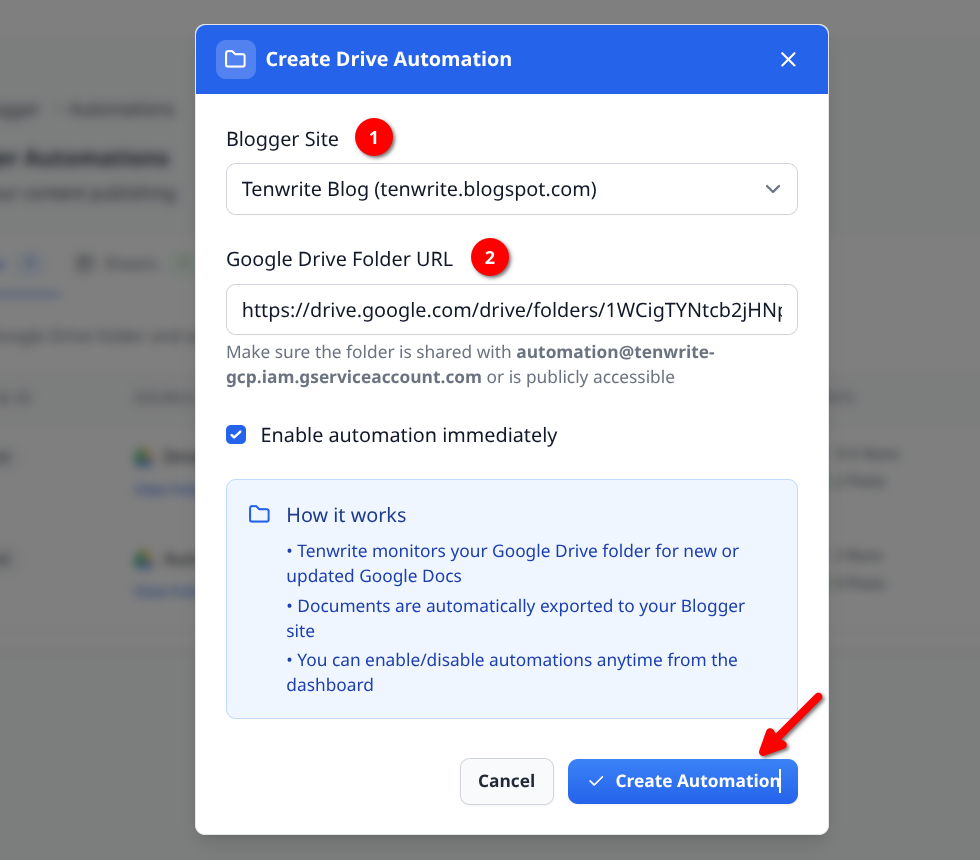
- Create a folder in Google Drive and share it with Tenwrite’s automation service account ([email protected]).
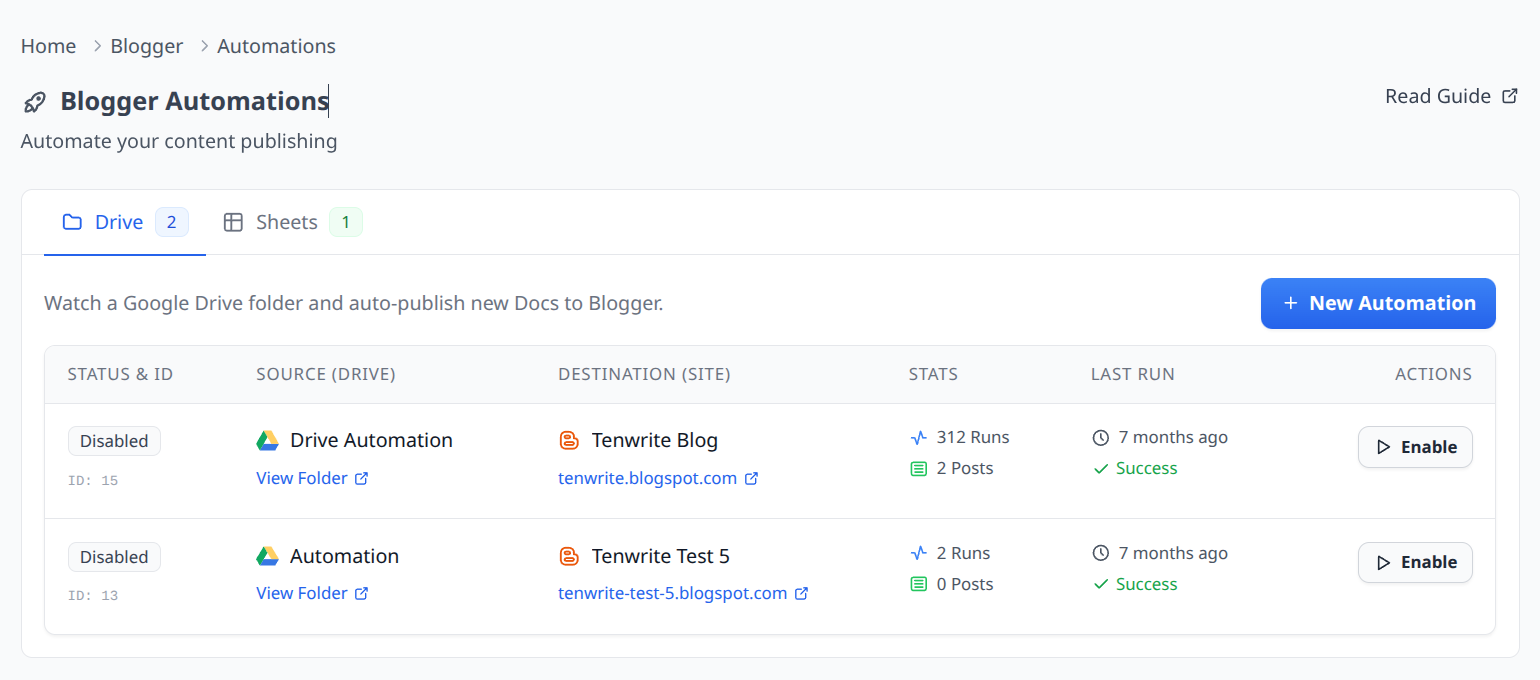
- In Tenwrite, go to Blogger > Automations, open the Drive tab, and create a new automation. Choose your target Blogger blog and paste in the folder URL.
- Tenwrite checks the folder every hour. New Google Docs become new Blogger posts. Google Docs that have been updated since the last run sync back to their existing posts automatically.
Posts created via Drive Automation are saved as drafts by default. To control the status, labels, publish date, or other per-post settings without opening an export form, add a Frontmatter table to the top of your Google Doc. Tenwrite reads it during the automation run and removes it from the published content — your readers never see it.
Once the automation is active, your publishing workflow becomes: write in Google Docs → drop the file into the folder → Tenwrite handles the rest.
For the full setup walkthrough, see the Blogger Drive Automation guide.
Bulk Publishing with Sheet Automation
For high-volume work — product pages, location-based content, programmatic SEO campaigns — Sheet Automation turns a Google Sheet into a publishing queue. Each row defines a post: title, content (written directly or via a Google Doc URL), labels, status, and target blog.
A single sheet can target multiple Blogger blogs at once. Each row can point to a different blog in the SITE column, so you can manage content across all your blogs from one spreadsheet. Tenwrite processes the sheet every hour and creates or updates posts for each valid row. The maximum is 500 rows per sheet.
See the Blogger Sheet Automation guide for the full column reference, a ready-made template, and setup instructions.
Frequently Asked Questions
Does Tenwrite preserve my formatting when exporting to Blogger?
Yes. Tenwrite converts the Google Doc to clean HTML before sending it to Blogger. The default “Balanced” cleanup removes the inline style noise that Google Docs generates while preserving meaningful formatting: headings, bold and italic text, lists, tables, and links all come through correctly.
What happens to images in my Google Doc?
Images are extracted from the document and hosted on Tenwrite’s CDN. The published post references those hosted URLs. Images load reliably and don’t depend on Google’s internal document servers.
Can I export multiple Google Docs at once?
Yes. In Step 4, you can add as many documents as you need in one batch. Each document gets its own row in the export table with individual progress tracking, so you can see exactly which ones succeeded and which need attention.
Can I schedule a post instead of publishing immediately?
Yes. In Step 5, set Status to Scheduled and fill in the Publish Date. Blogger will publish the post at that time. Dates use your Google account’s timezone.
Does this work with both the Google Docs add-on and the web dashboard?
Yes. The add-on (installed from the Google Workspace Marketplace via Extensions > Tenwrite) and the web dashboard at app.tenwrite.com share the same interface and the same features. The choice between them comes down to personal preference.
Is there a free plan?
Yes. Tenwrite has a free tier with no credit card required. See the pricing page for current plan details.
What to Do Next
- Install the Tenwrite add-on from the Google Workspace Marketplace
- Open the web dashboard at app.tenwrite.com
- Connect your Blogger blogs to Tenwrite
- Set up Drive Automation to publish automatically from a Google Drive folder
- Set up Sheet Automation for bulk publishing and programmatic SEO workflows
Leave a Reply