How to export Google Docs to Blogger
Tenwrite is a Google Docs add-on that lets you publish your content from Google Docs to Blogger (Blogspot) while keeping the formatting intact.
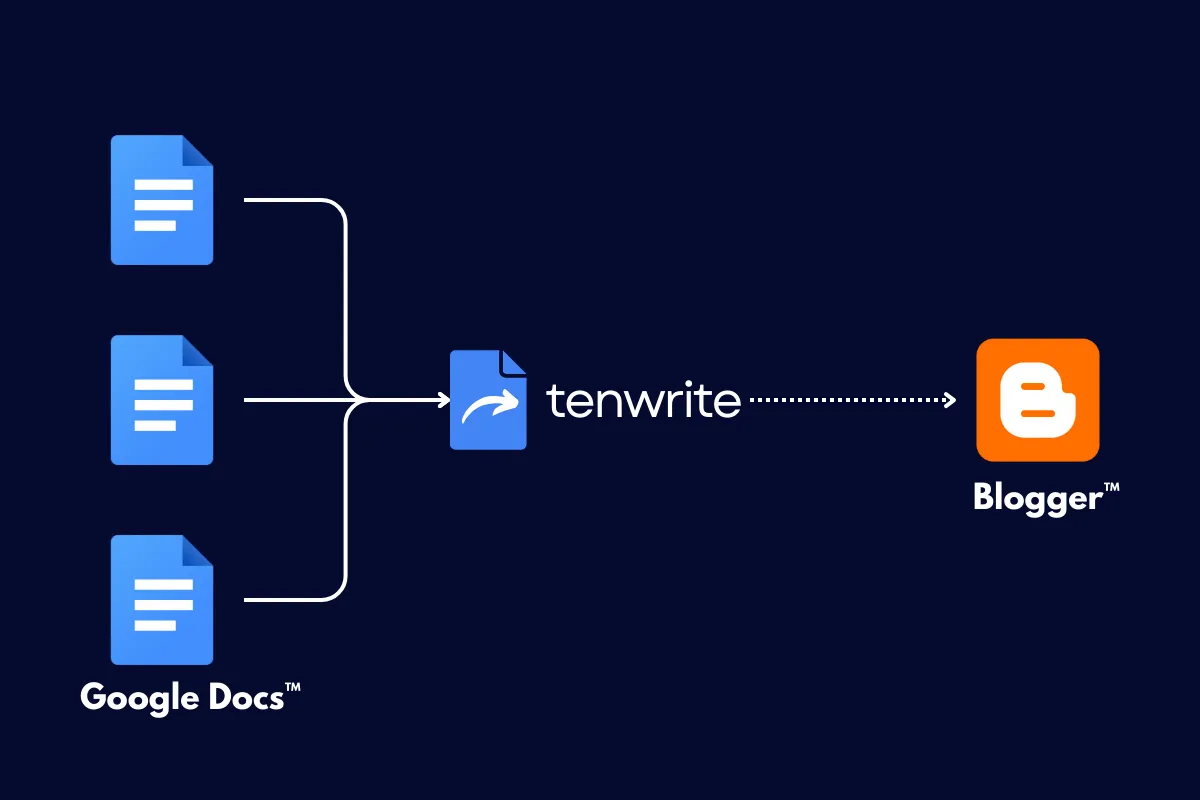
In this step-by-step guide, we’ll learn how to publish a single Google Docs content to Blogger using the Tenwrite add-on.
Prerequisites
Before you begin, make sure to meet the following requirements:
- Install the Tenwrite add-on: You need to have the Tenwrite add-on installed in Google Docs. Read this guide to install the add-on if you’ve not done already.
- Blogger (Blogspot) Blog: You need to have one or more Blogger (Blogspot) blogs in your Google account. Go to blogger.com and create your blog if you don’t have one.
Step-by-Step Guide
Follow the steps below to publish your Google Docs to Blogger in a few clicks.
1. Open Google Docs
Ensure you are signed in to your Google account. Open Google Docs in your web browser (e.g. Google Chrome, Firebase, Safari etc.).
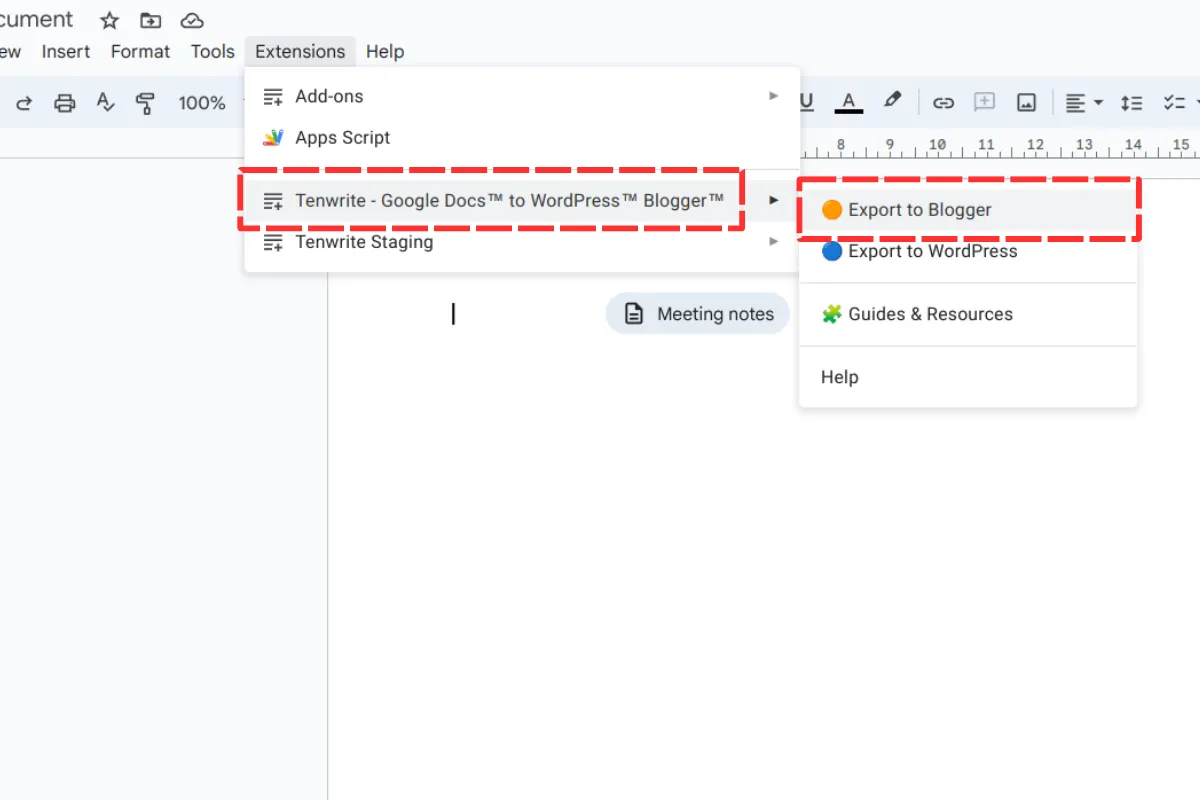
2. Launch the Tenwrite Add-on
From the top menu in Google Docs, click on Extensions > Tenwrite > Export to Blogger.
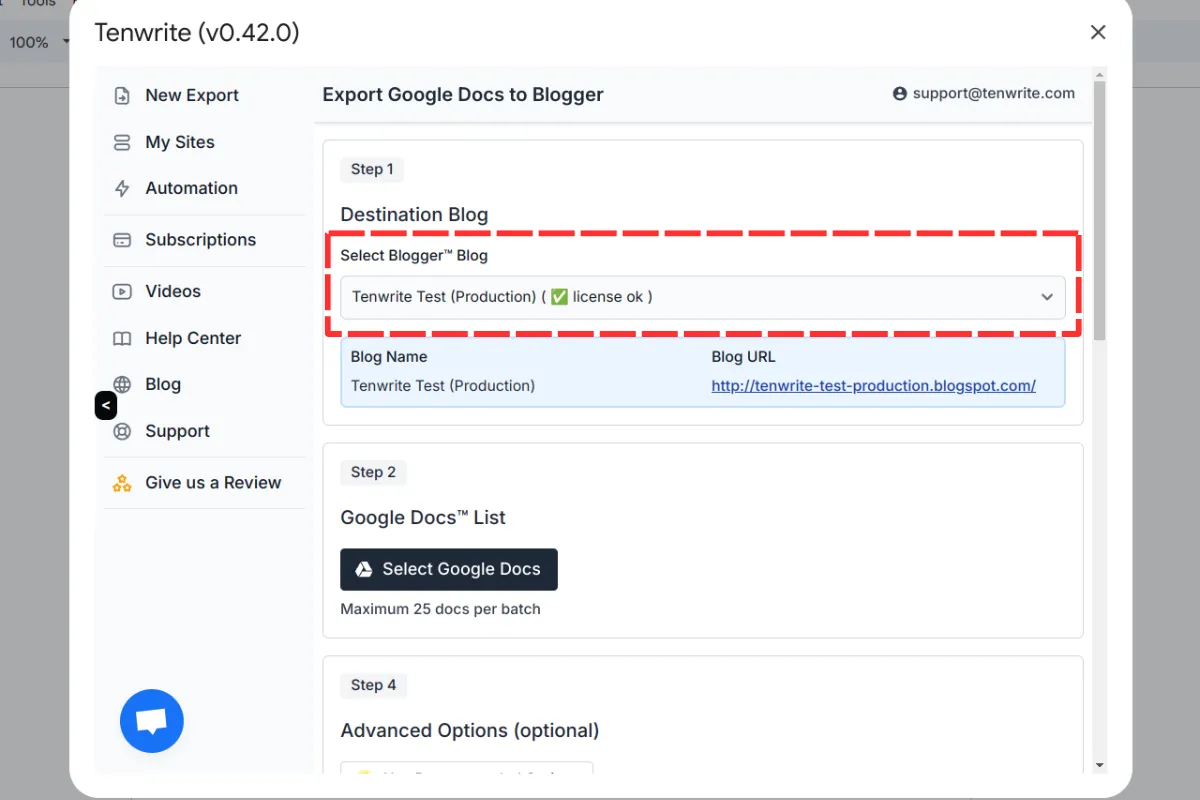
3. Select Destination Blog
If you have multiple blogs, click on the Select Blogger™ Blog dropdown and select your preferred blog where you want to transfer the content.
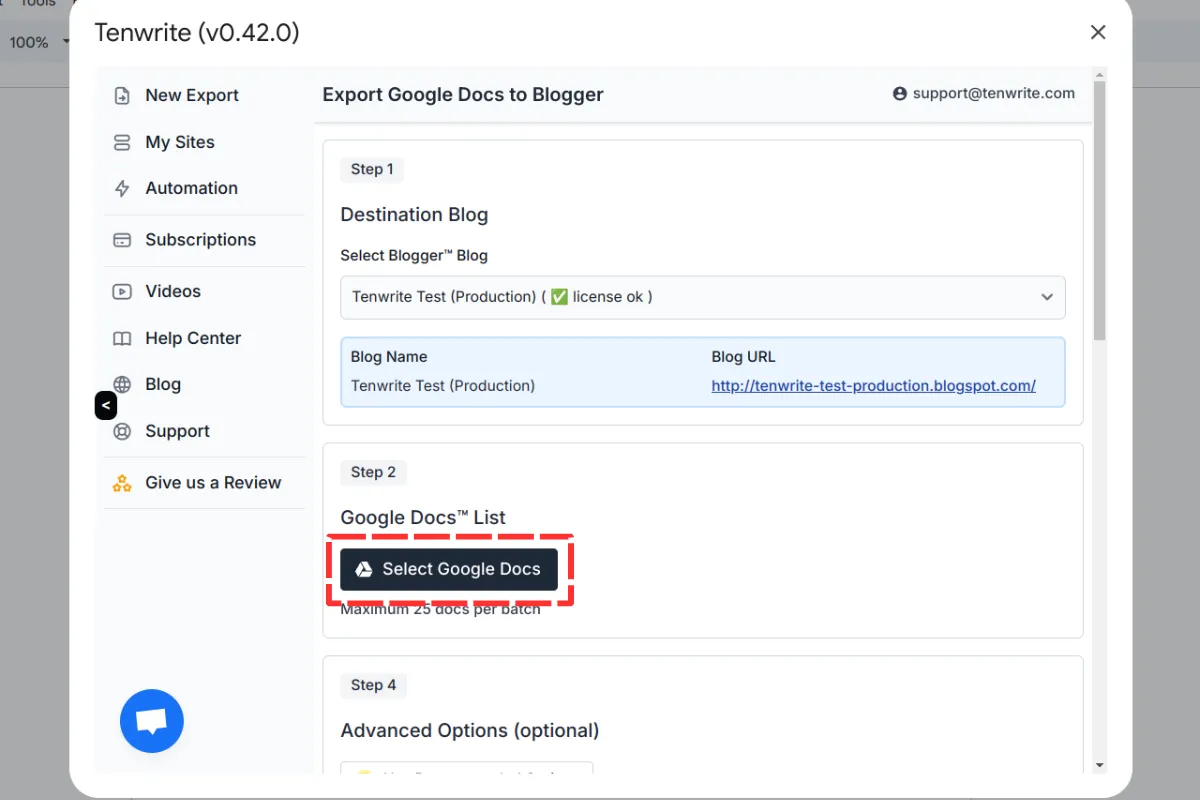
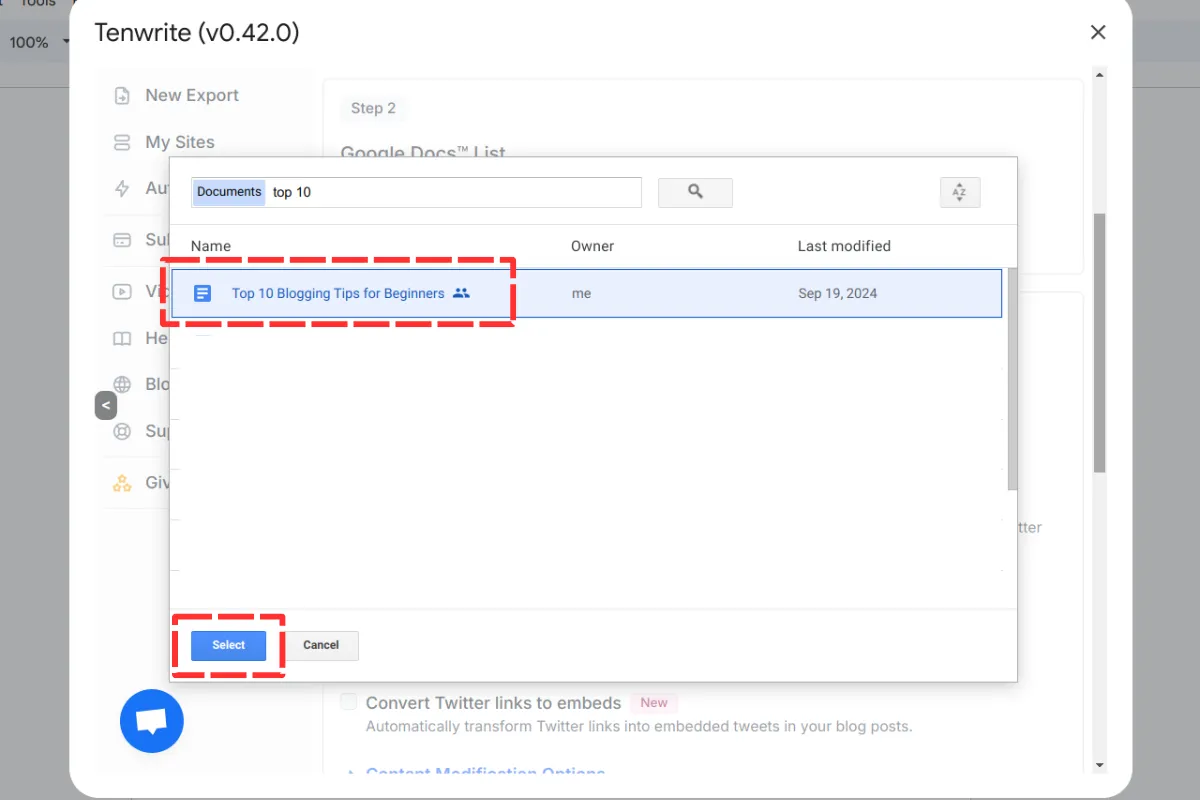
4. Select Google Docs
Click on the Select Google Docs button to launch the built-in Google Drive popup window. Select your Google Docs in the popup window and click on Select button.
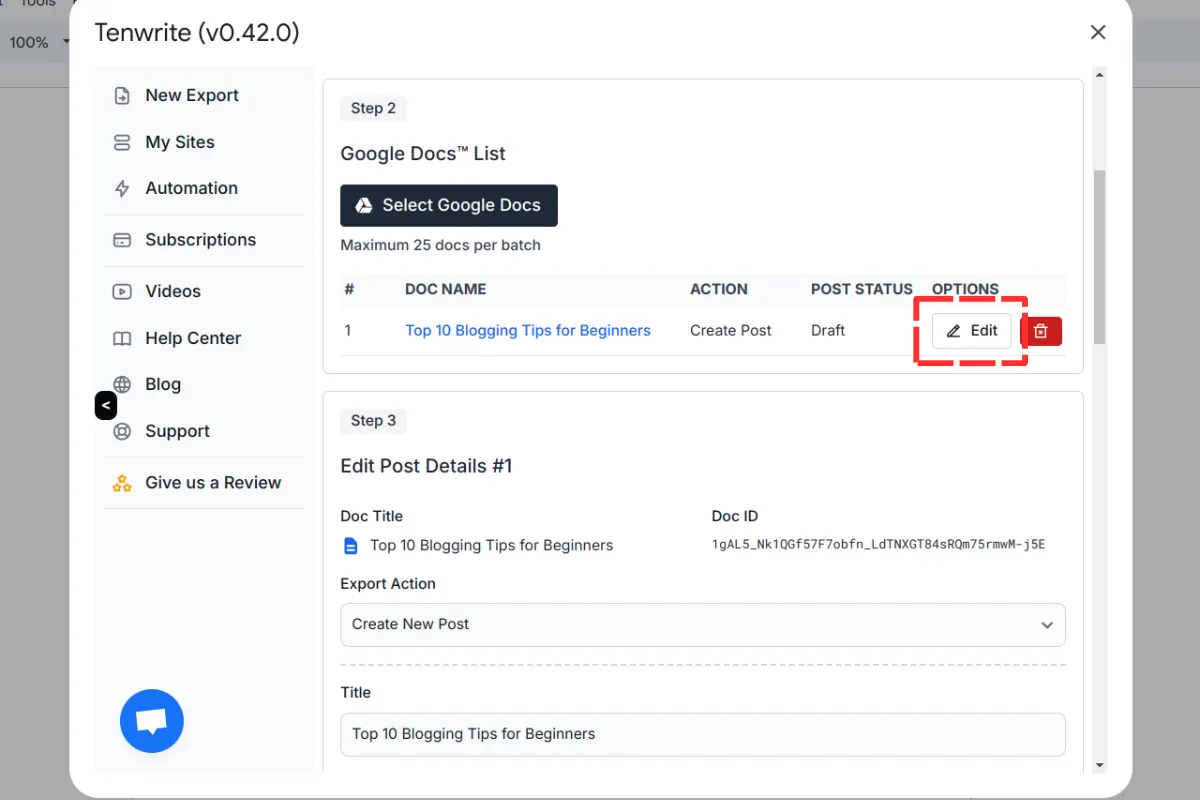
5. Edit Post Details
Click on the Edit button to edit the post details.
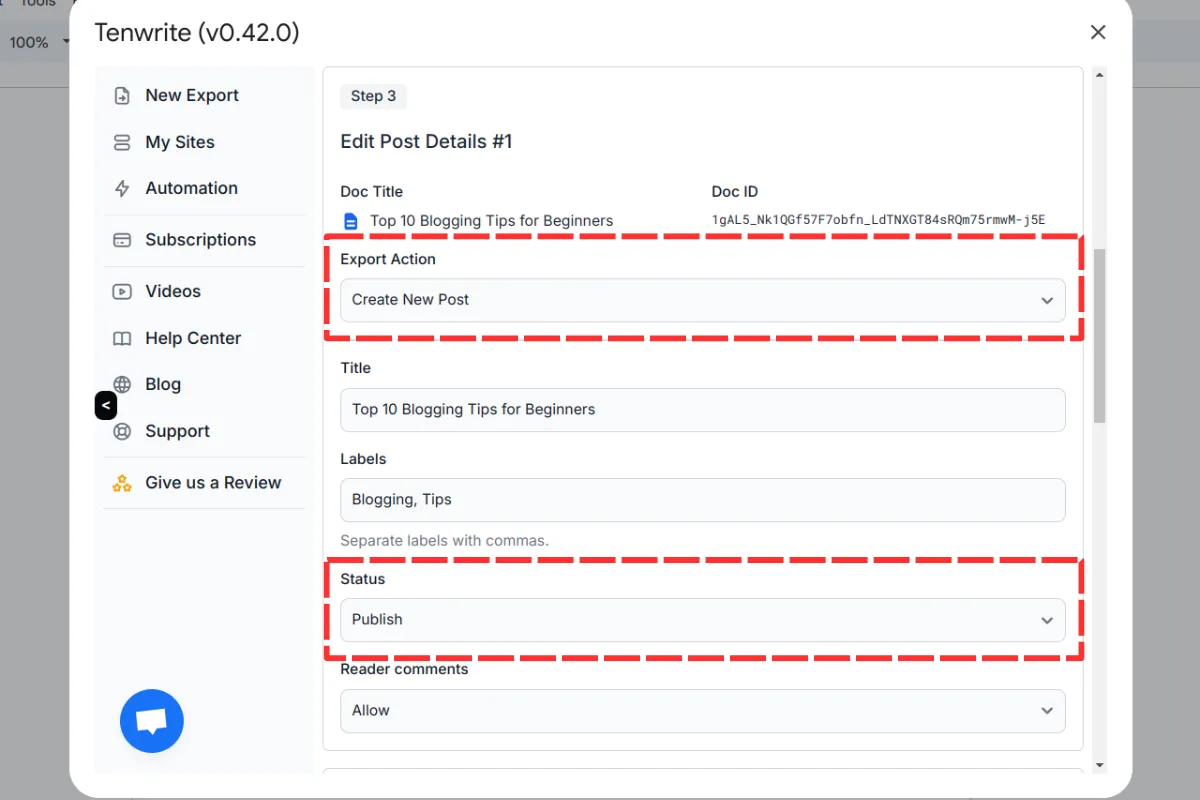
In the Export Action dropdown field, you can choose between Create New Post or Update Existing Post. For this tutorial, we’ll be creating a new post. Next, edit the Post Title, Labels, Status and Reader Comments fields.
6. Advanced Options
There are a lot of advanced options that you can enable based on your requirements.
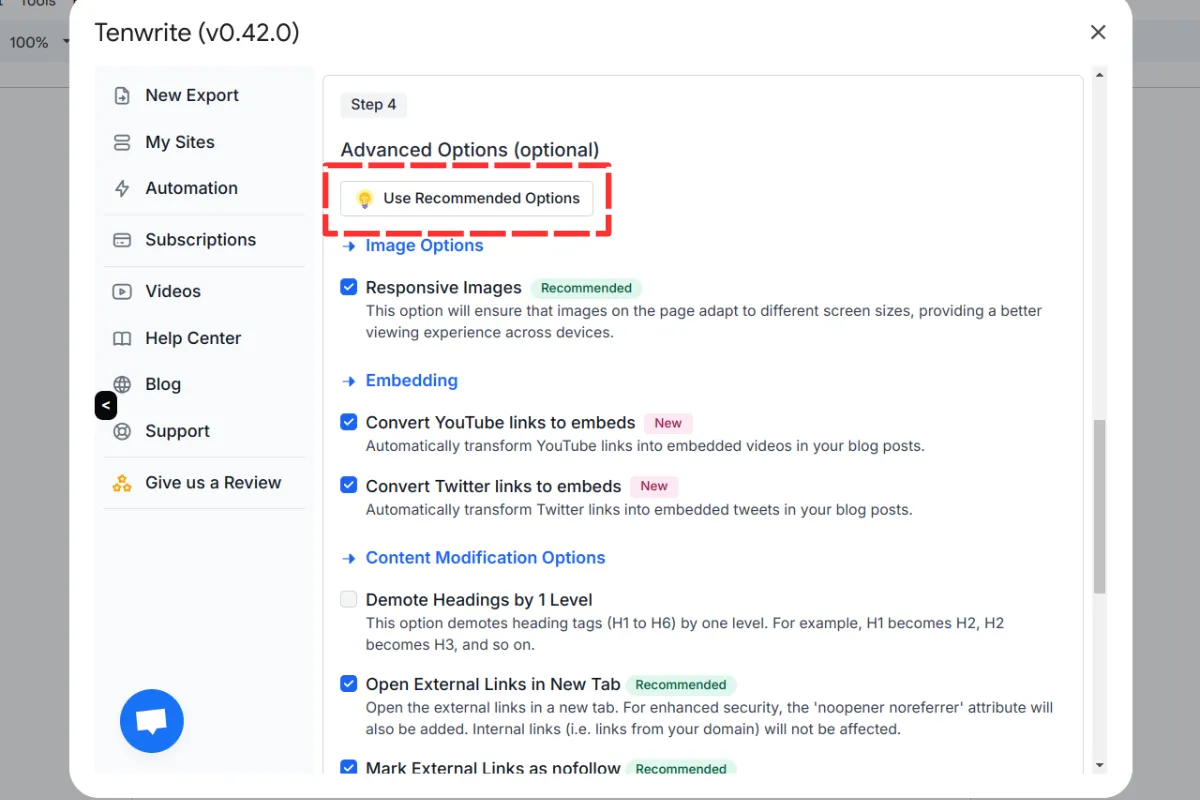
Image Options
- Responsive Images: This option will ensure that images on the page adapt to different screen sizes, providing a better viewing experience across devices.
Embedding
-
Convert YouTube links to embeds: Automatically transform YouTube links into embedded videos in your blog posts.
-
Convert Twitter links to embeds: Automatically transform Twitter links into embedded tweets in your blog posts.
Content Modification Options
-
Demote Headings by 1 Level: This option demotes heading tags (H1 to H6) by one level. For example, H1 becomes H2, H2 becomes H3, and so on.
-
Open External Links in New Tab: Open the external links in a new tab. For enhanced security, the ‘noopener noreferrer’ attribute will also be added. Internal links (i.e. links from your domain) will not be affected.
-
Mark External Links as nofollow: Add ‘nofollow’ attribute to external links. This will exclude external links from search engine ranking. Internal links (i.e. links from your domain) will not be affected.
-
Optimize Line Height: This option will increase the line height to a minimum of 1.5, providing better spacing between lines of text.
-
Convert Size Units (pt to px): This option will convert font sizes from points (pt) to pixels (px) for consistent display across devices. Note: This conversion uses a standard ratio of 1pt = (96 / 72) px.
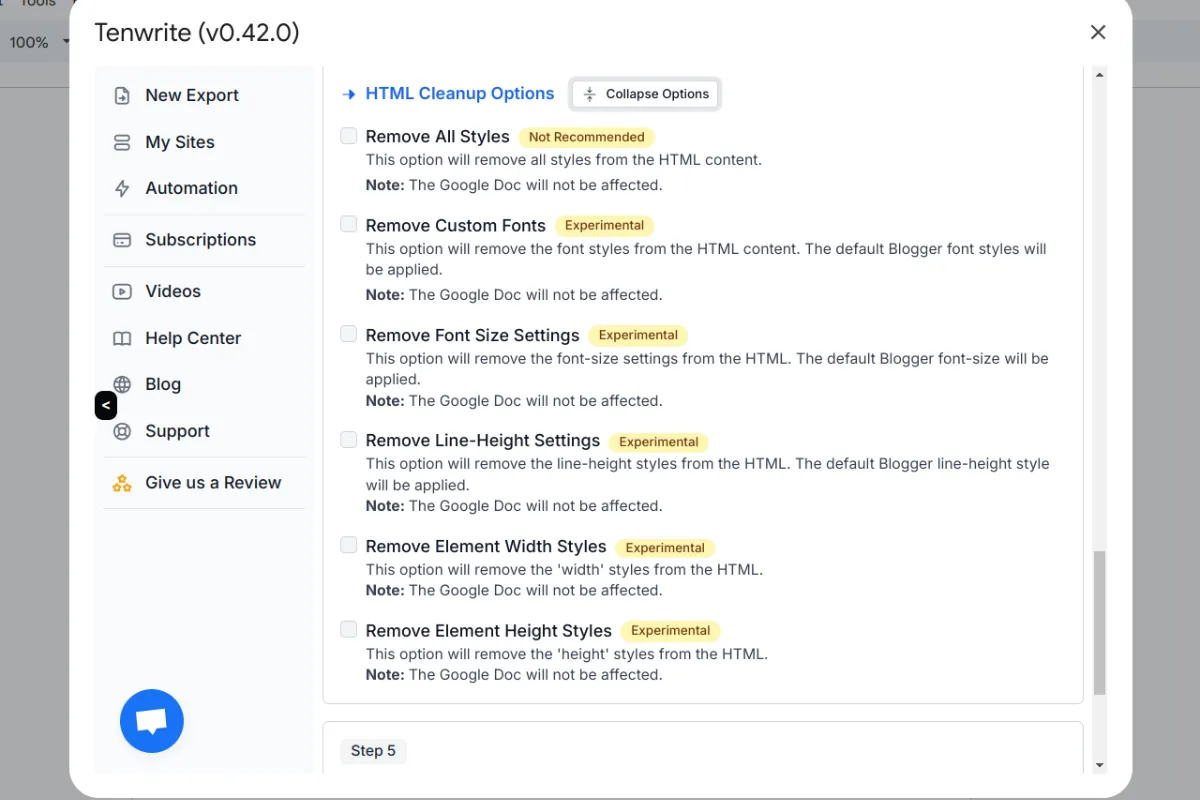
HTML Cleanup Options
-
Remove All Styles: This option will remove all styles from the HTML content.
-
Remove Custom Fonts: This option will remove the font styles from the HTML content. The default Blogger font styles will be applied.
-
Remove Font Size Settings: This option will remove the font-size settings from the HTML. The default Blogger font-size will be applied.
-
Remove Line-Height Settings: This option will remove the line-height styles from the HTML. The default Blogger line-height style will be applied.
-
Remove Element Width Styles: This option will remove the ‘width’ styles from the HTML.
-
Remove Element Height Styles: This option will remove the ‘height’ styles from the HTML.
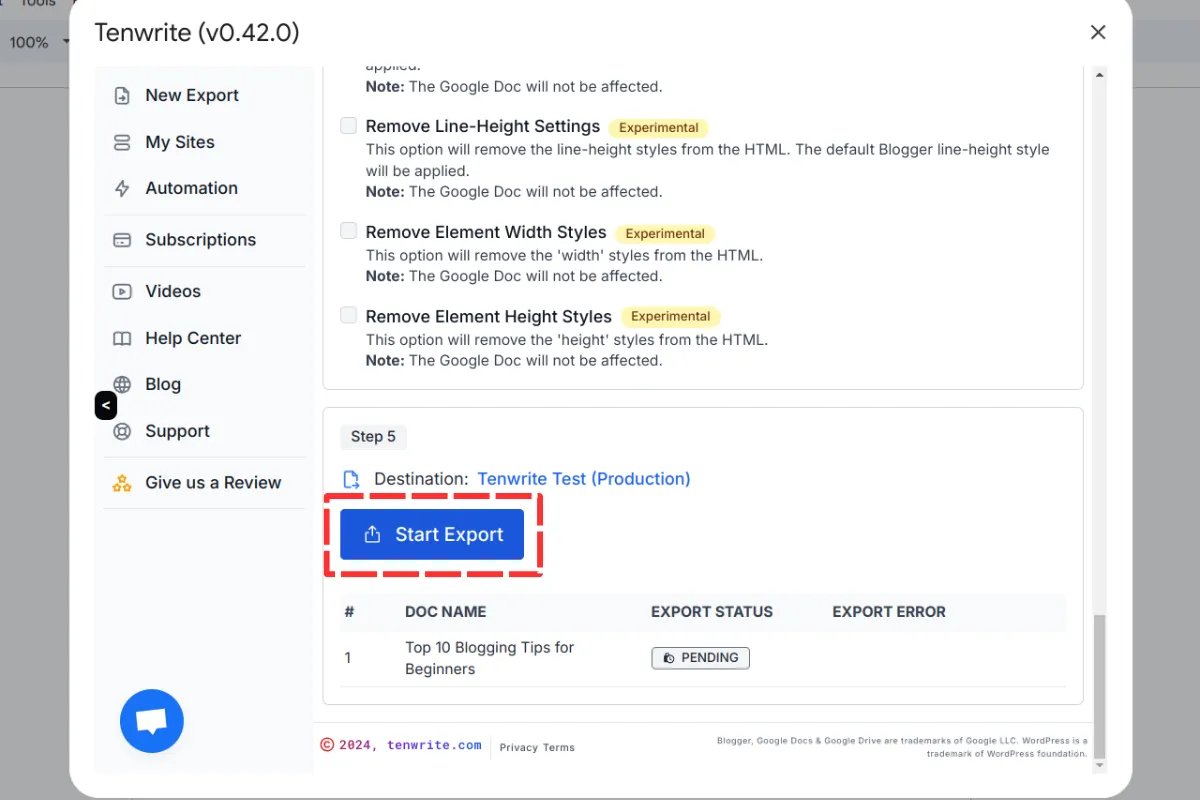
7. Start the Export
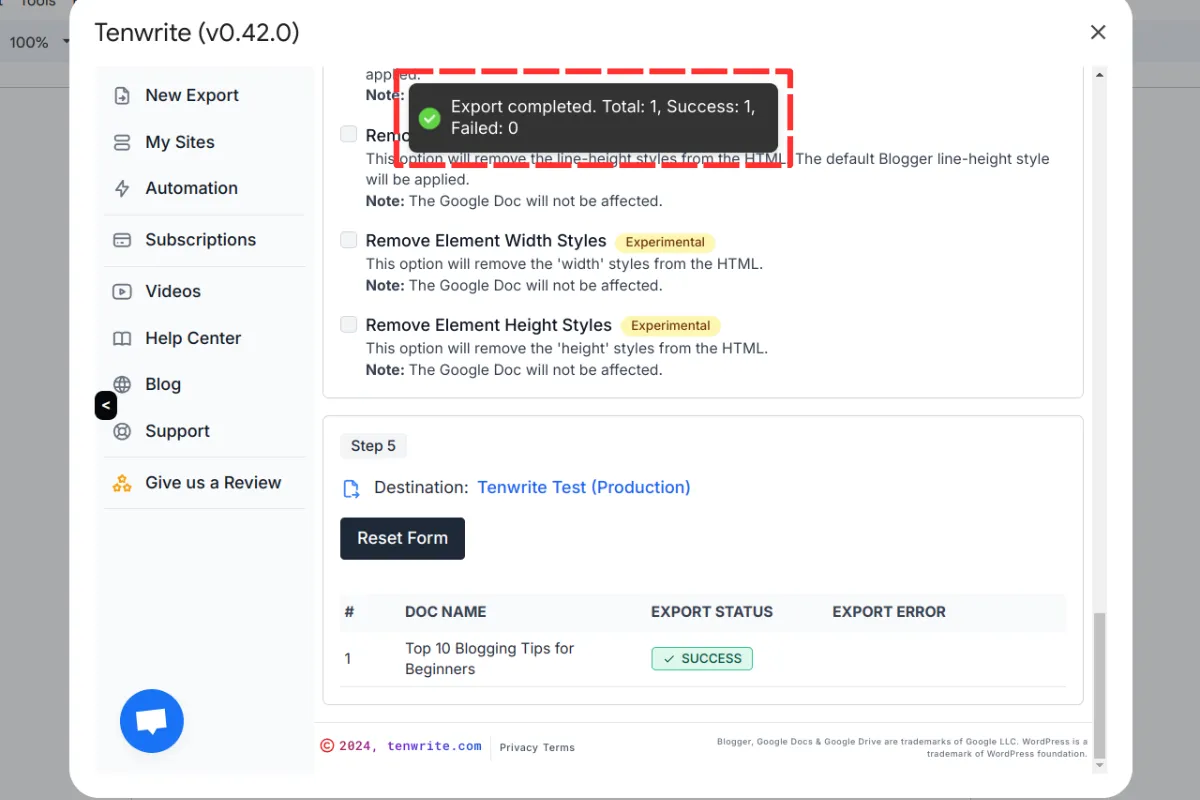
When you’re ready, click on the Start Export button. You’ll receive a notification once the export process is completed.
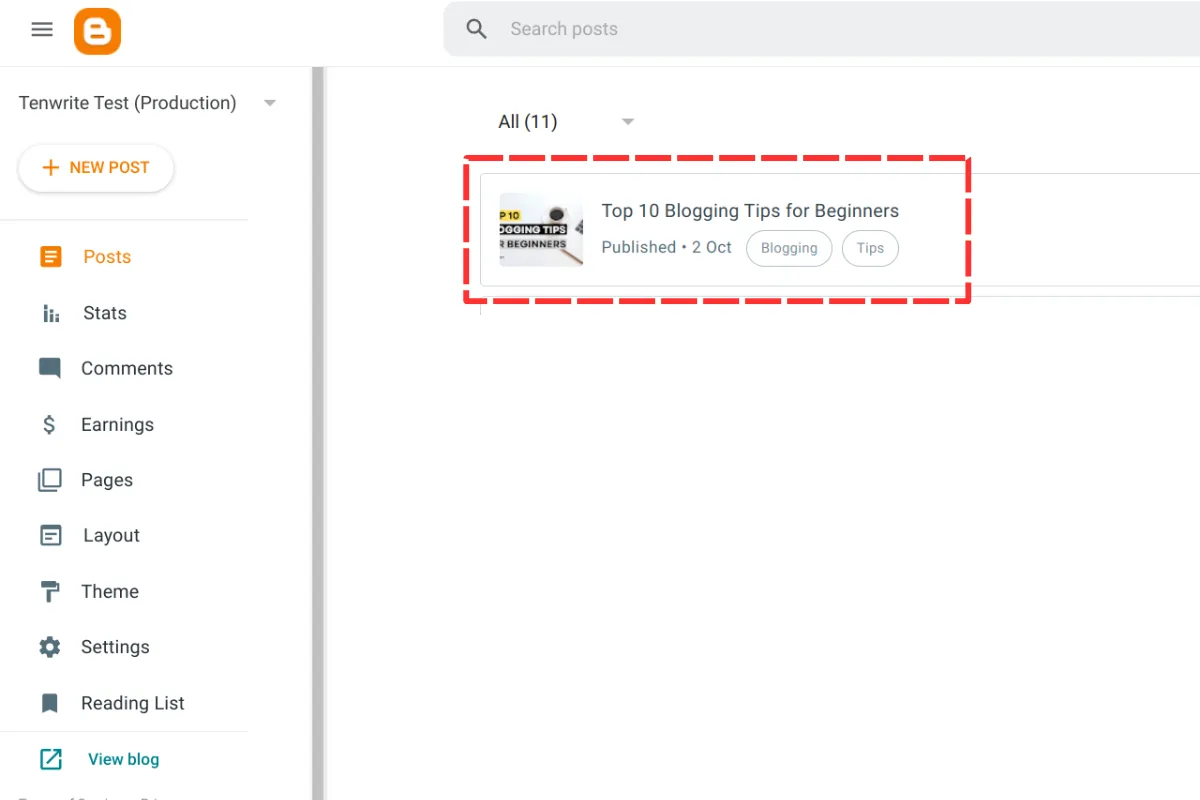
8. View the post on your blog
Finally, open your Blogger admin portal and check the post.
Conclusion
Congratulations! You’ve successfully published your Google Docs to Blogger using the Tenwrite add-on in just a few clicks.
If you faced any issues or need any help, please contact us at support@tenwrite.com, we’re help to help!