
Export Google Docs to Blogger
Tenwrite lets you publish Google Docs directly to Blogger — one at a time or in a batch. You pick the destination blog, add your documents, set any post details you need, and hit Start Export. Tenwrite handles the conversion and publishing.
Before You Start
Section titled “Before You Start”Make sure you have:
- A Blogger account with at least one blog, connected to Tenwrite (see How to Connect Your Blogger Blogs)
- One or more Google Docs ready to publish
Open the Export Page
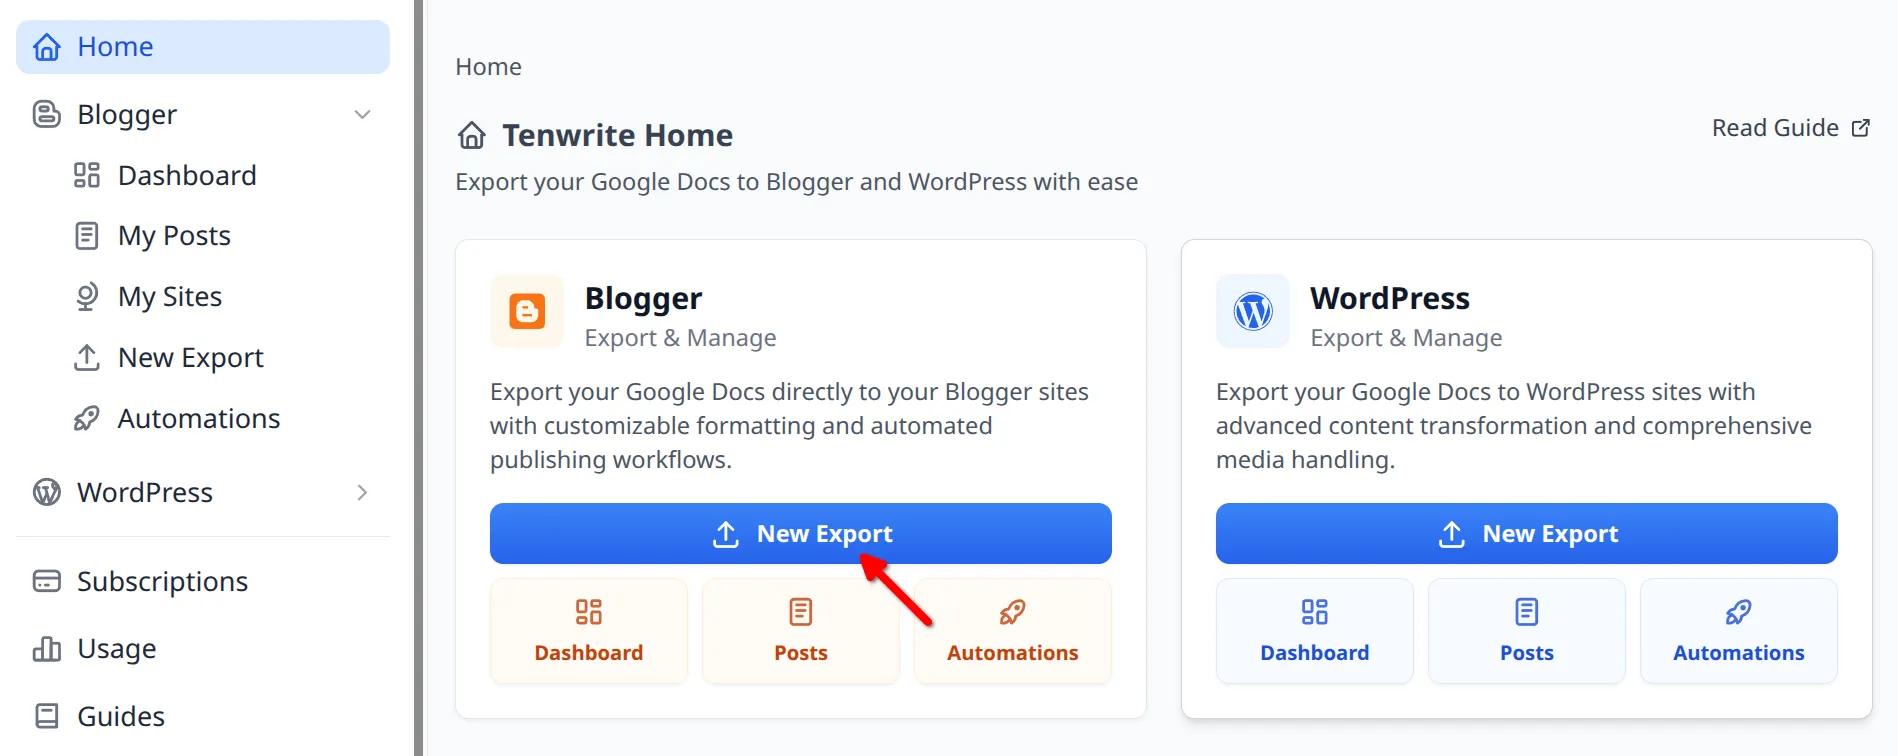
Section titled “Open the Export Page”Open the Tenwrite add-on or the Web Dashboard, then click Blogger > New Export.
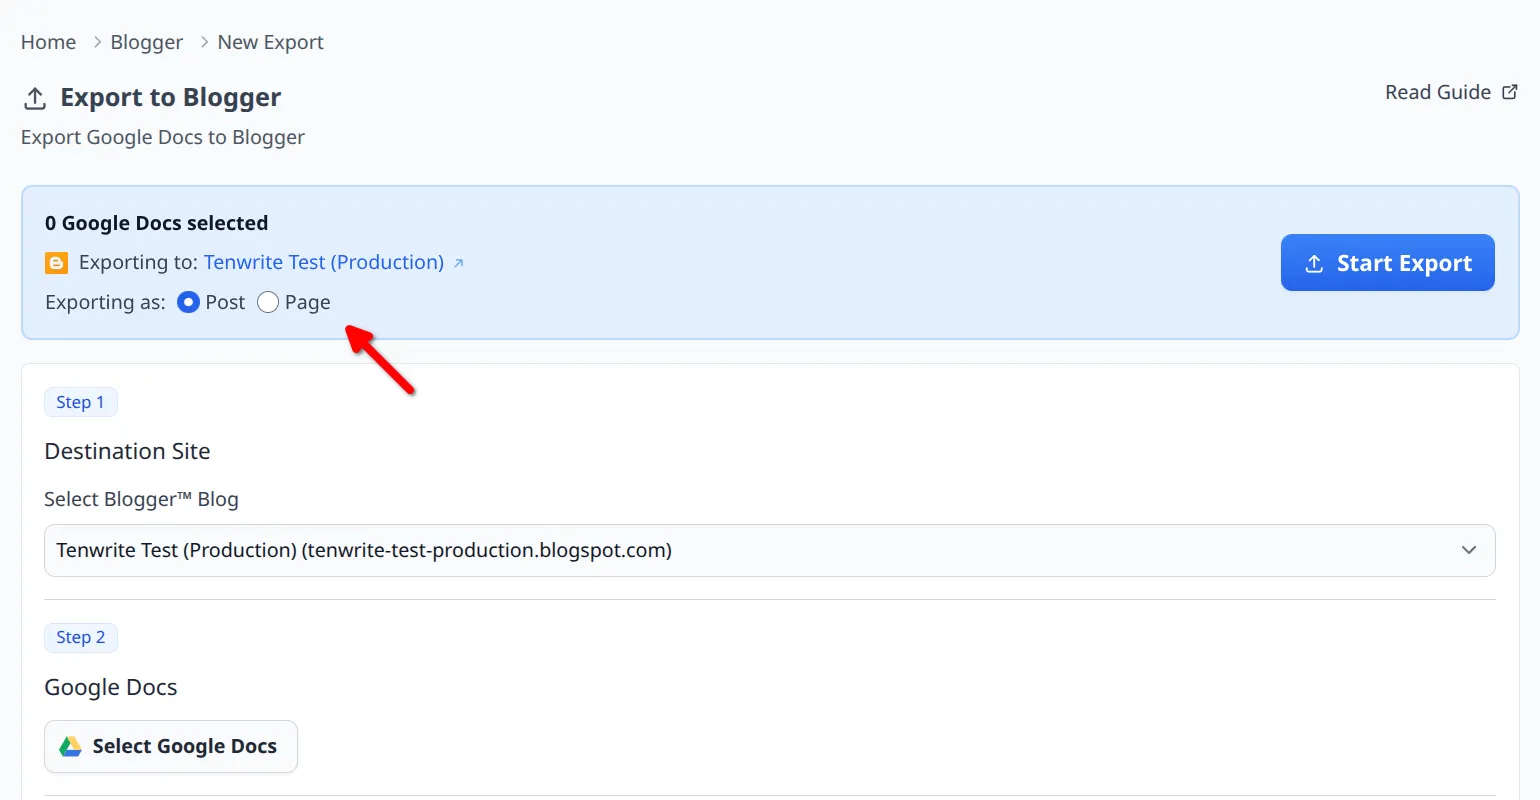
Choose: Post or Page
Section titled “Choose: Post or Page”At the top of the export form, choose whether Blogger should create a Post (standard blog content) or a Page (static standalone content). You can change this at any point before starting the export.
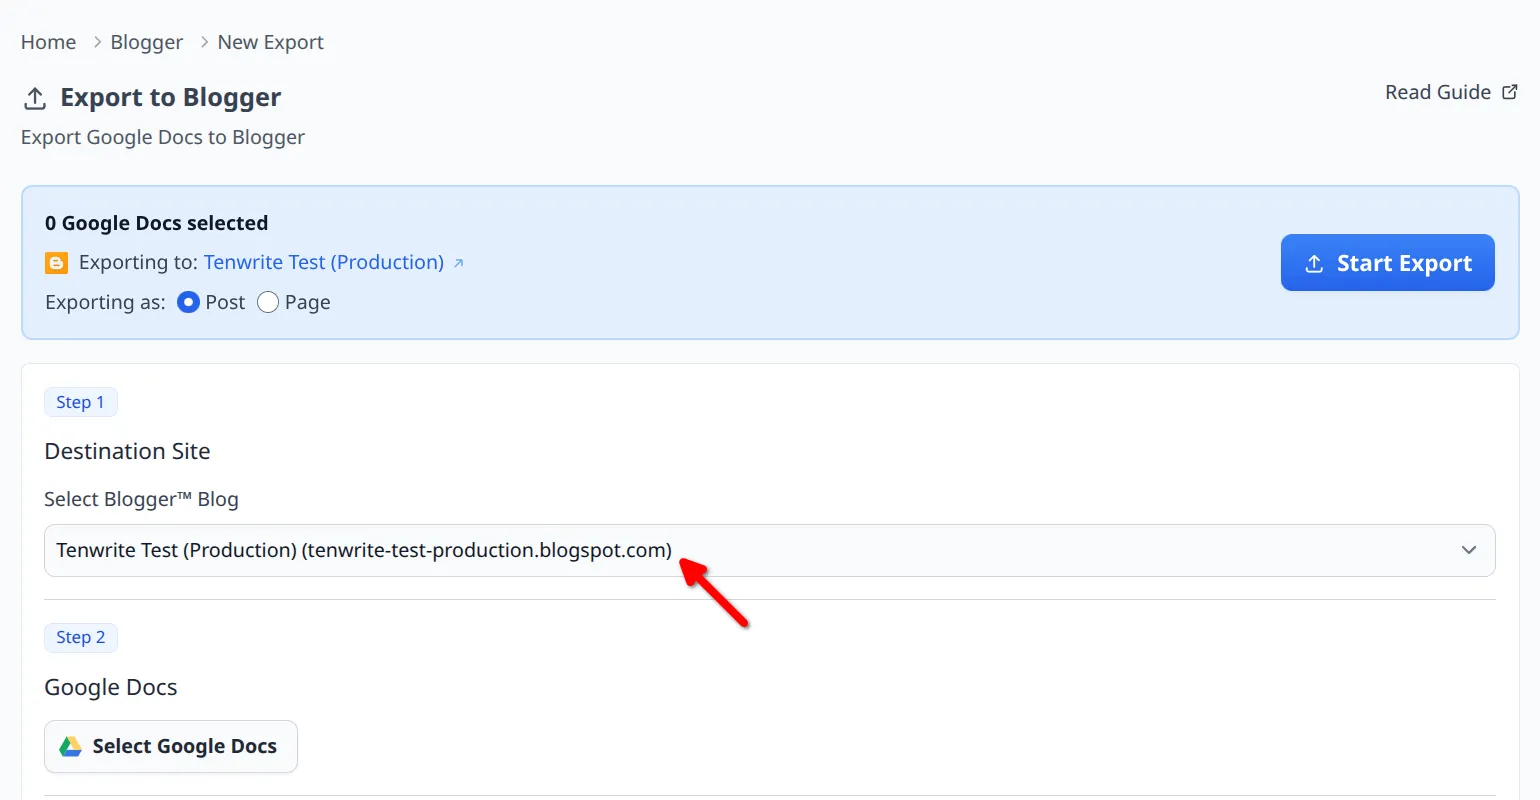
Step 1 — Choose Your Destination Blog
Section titled “Step 1 — Choose Your Destination Blog”Select the Blogger blog you want to publish to. This applies to all documents in the batch.
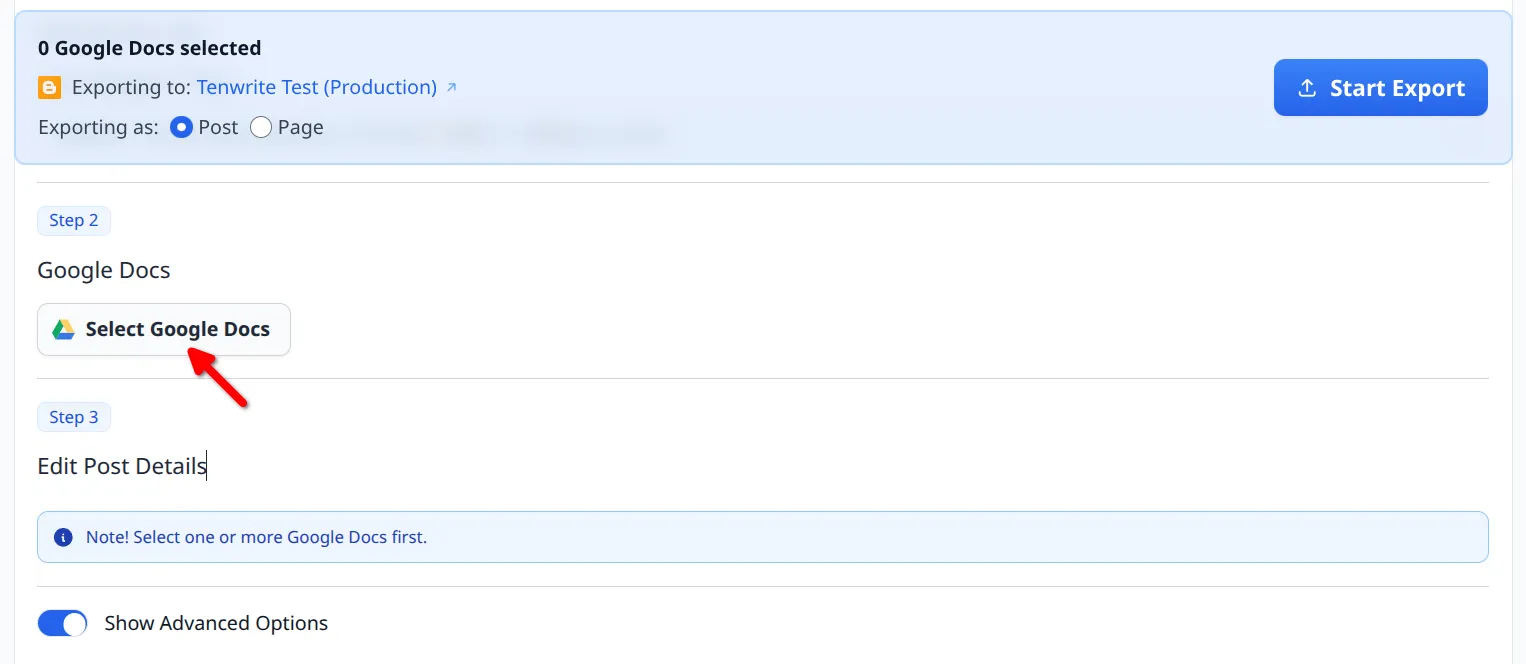
Step 2 — Add Your Google Docs
Section titled “Step 2 — Add Your Google Docs”Click Select Google Docs, pick one or more files from the Google Drive picker, then click Select to add them to the export list.
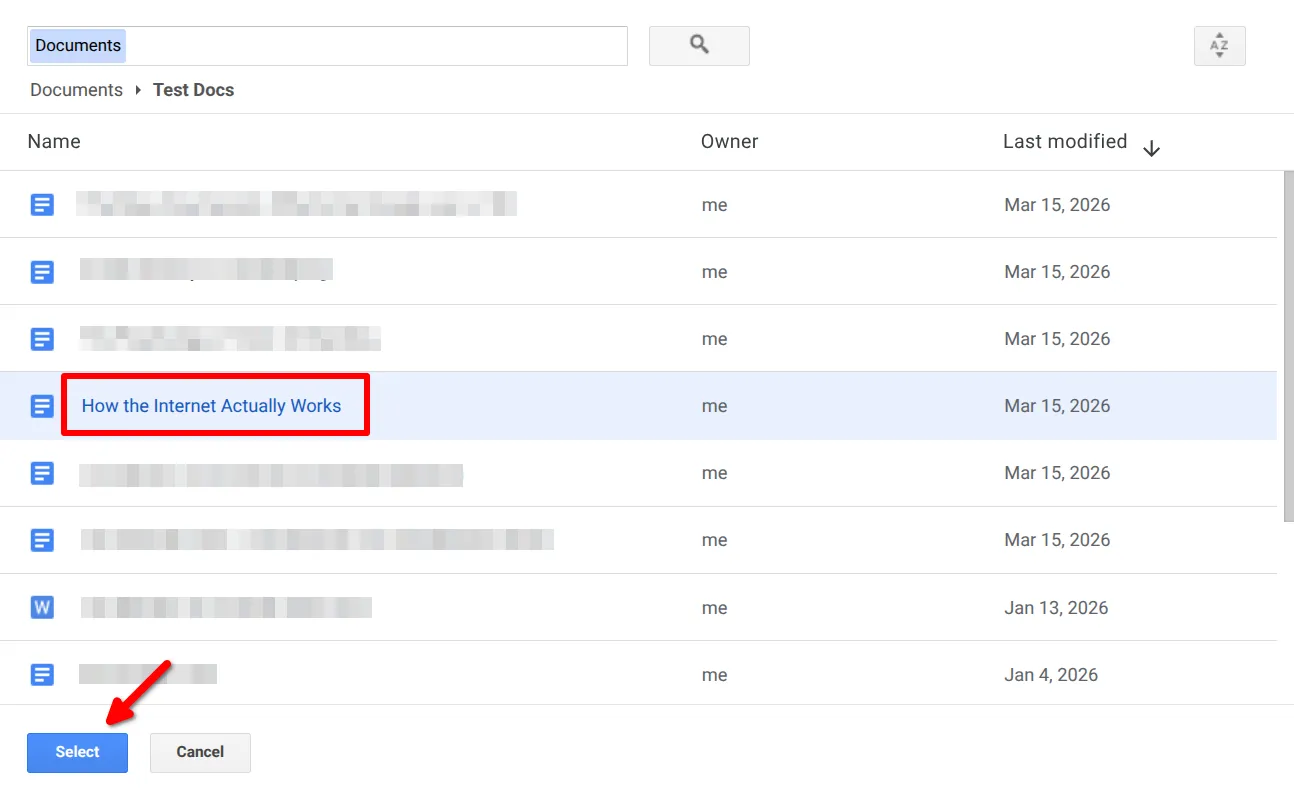
Once added, your documents appear in a table below the picker. You can:
- Click Add Google Docs to include more files.
- Click the remove button next to any file you don’t want to export.
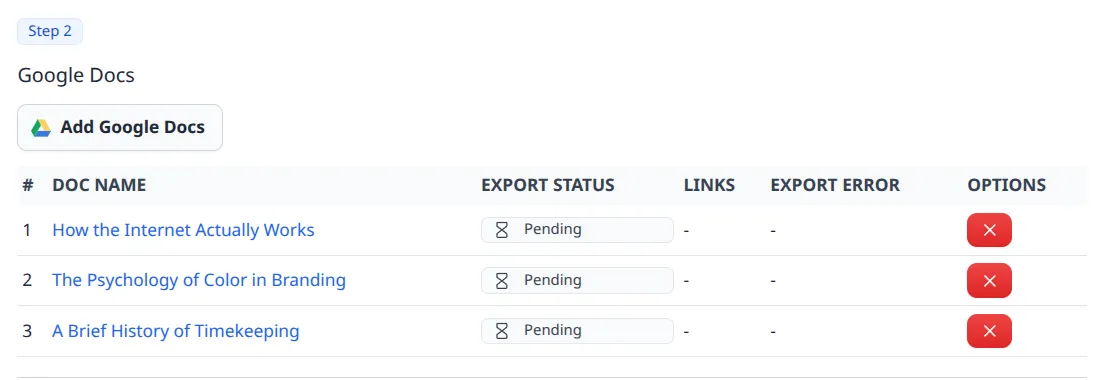
Step 3 — Set Post Details
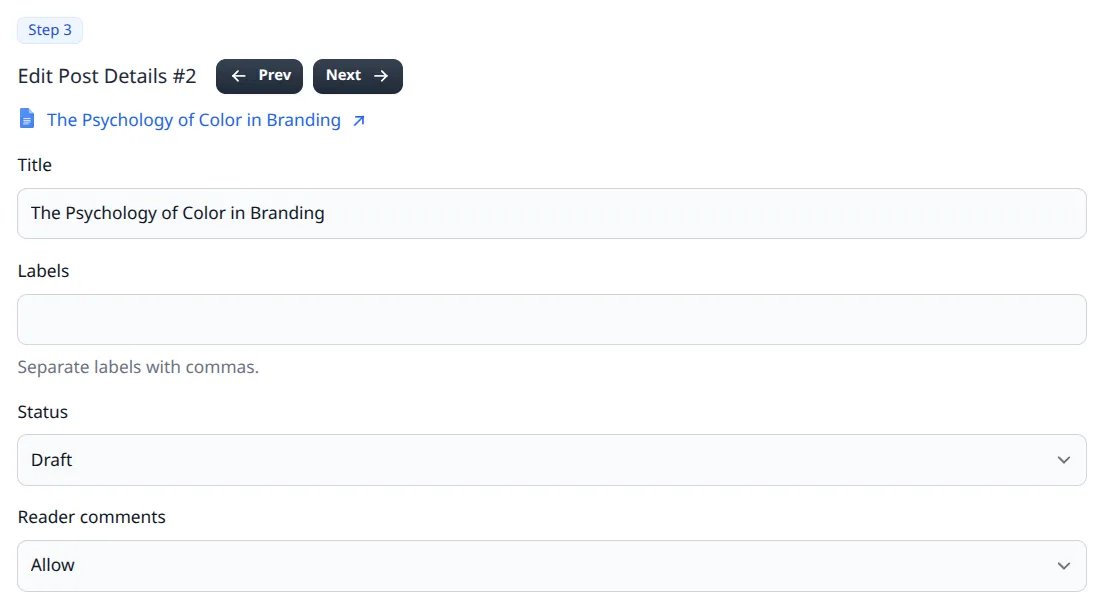
Section titled “Step 3 — Set Post Details”Tenwrite shows per-document settings for each file you’ve added. If you added multiple documents, use Prev and Next to move through them.
For every document, you can set:
- Title (required)
- Labels — Blogger labels, comma-separated
- Status —
Draft,Publish, orScheduled - Publish Date — appears when Status is set to
Scheduled - Reader comments — choose
Allow,Do not allow; show existing, orDo not allow; hide existing
If the document already contains frontmatter, Tenwrite shows a notice and Edit existing frontmatter. Filled fields—including labels and an explicit status—are read-only in the export form and marked Already set in frontmatter. Edit or remove the value in frontmatter to change it; empty fields use the form values. Without frontmatter, use the form normally; no table is needed or inserted. If Tenwrite cannot read or validate frontmatter, correct the problem before exporting. See Blogger frontmatter for scheduling and keeping dated posts as drafts. Blogger pages cannot be scheduled.
Step 4 — Advanced Options (Optional)
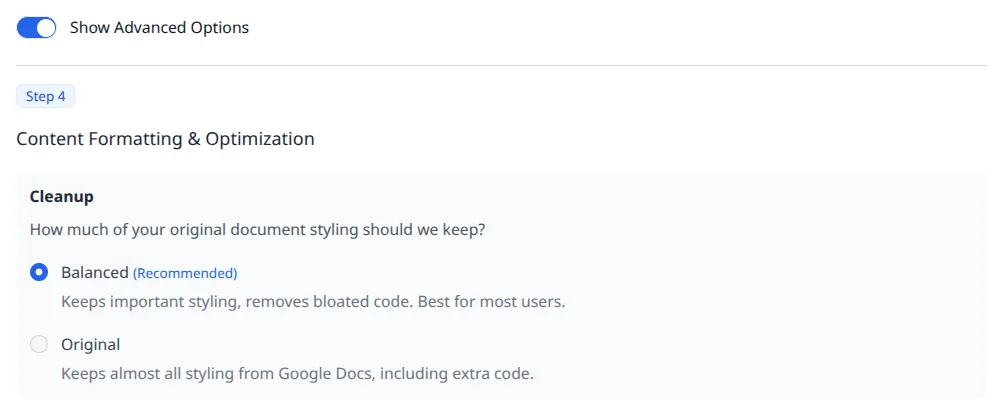
Section titled “Step 4 — Advanced Options (Optional)”If you want more control over how the content is converted, click Show Advanced Options to reveal Step 4: Content Formatting & Optimization.
Cleanup
Section titled “Cleanup”Controls how much of Google Docs’ original styling comes through:
- Balanced — strips unnecessary markup while preserving important formatting. This is the recommended default.
- Original — keeps more of the original styling if you need it.
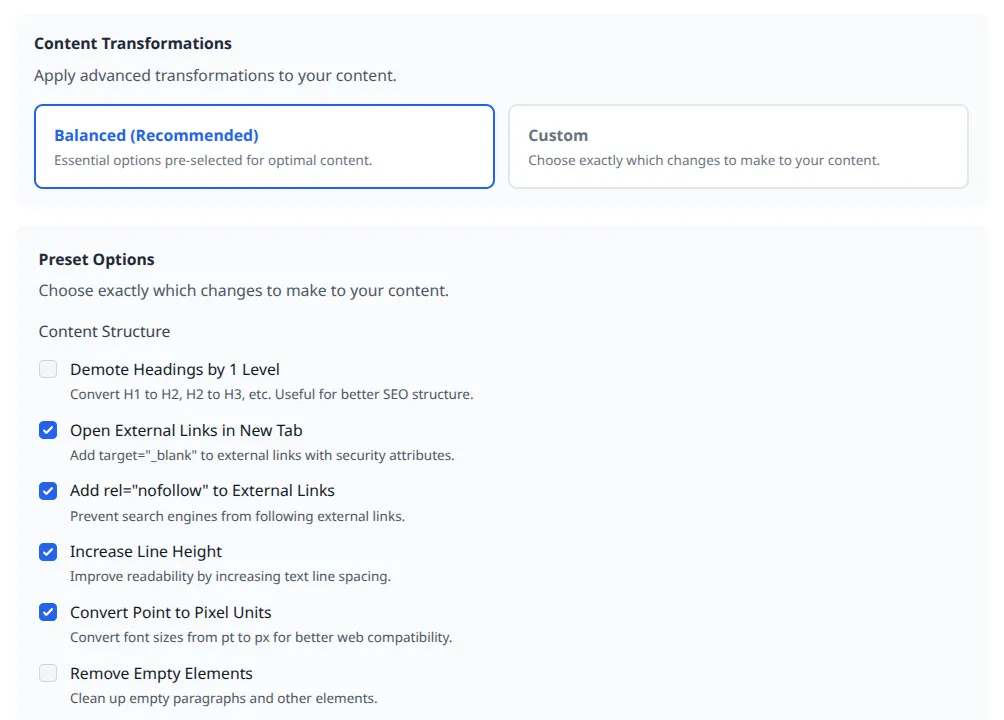
Content Transformations
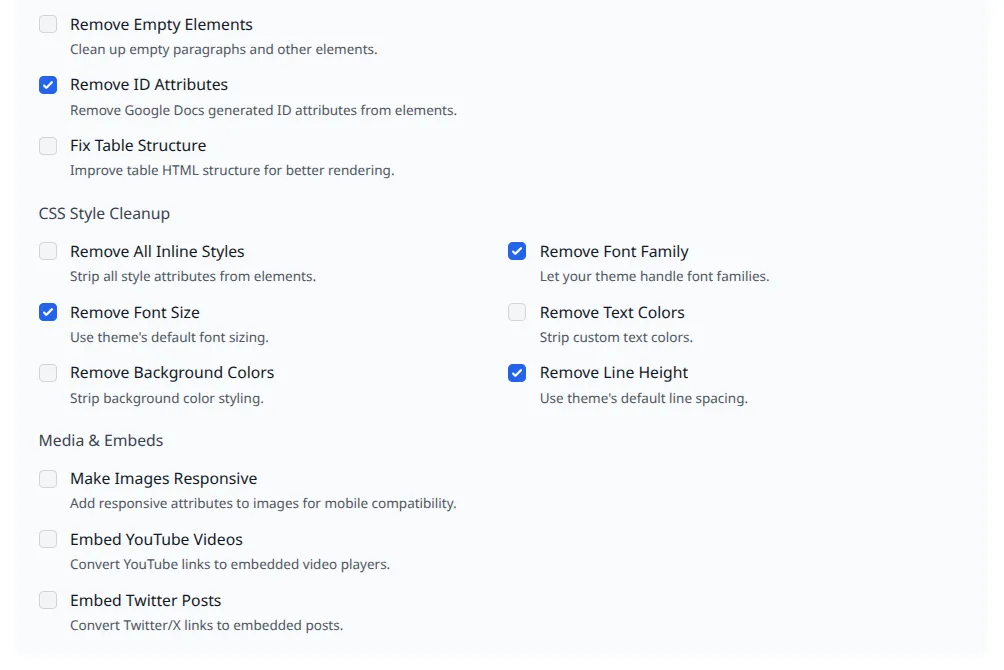
Section titled “Content Transformations”- Balanced (Recommended) — applies a sensible, pre-selected set of transformations. Start here.
- Custom — gives you full control over individual transformation settings.
When you switch to Custom, Tenwrite auto-saves your preferences as a preset.
Start the Export
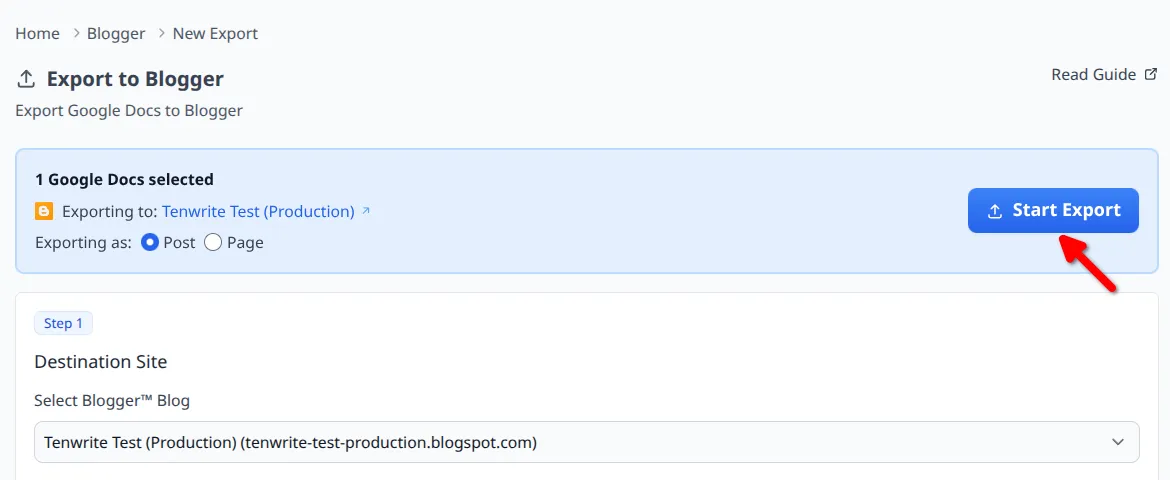
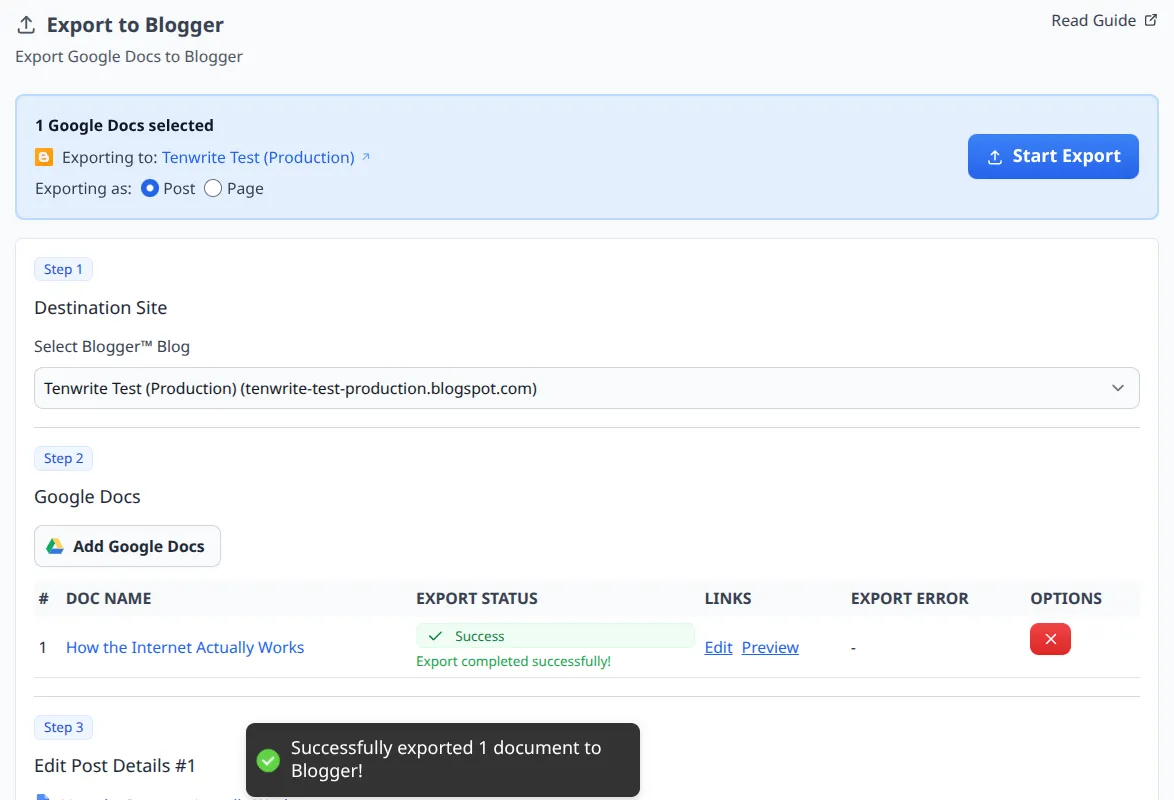
Section titled “Start the Export”Before you click Start Export, check that the header shows the right number of documents, the correct destination blog, and the right export type (Post or Page).
Clicking Start Export opens Confirm publication outcome; it does not start publishing yet. Review the actual status, date, and timezone for each document, then click Confirm Export. Choose Back to settings if you need to change anything.
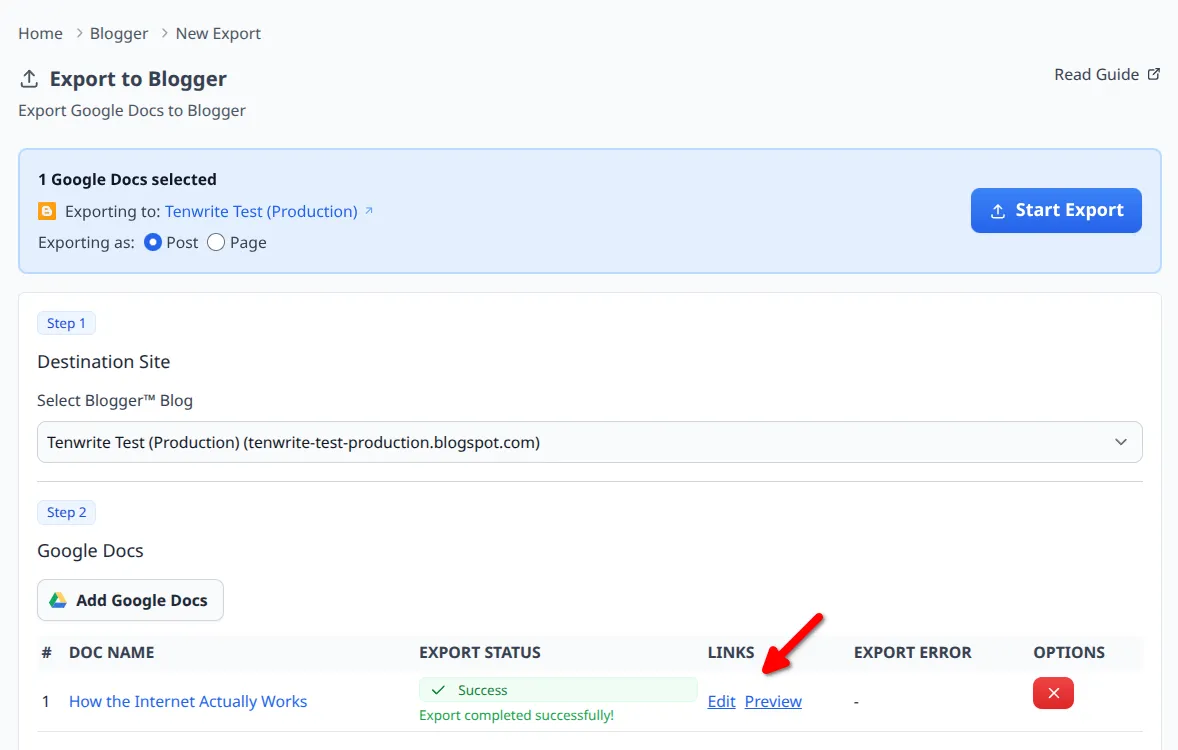
Each row tracks its own status — Pending, Processing, Success, or Error — so you can follow progress in real time.
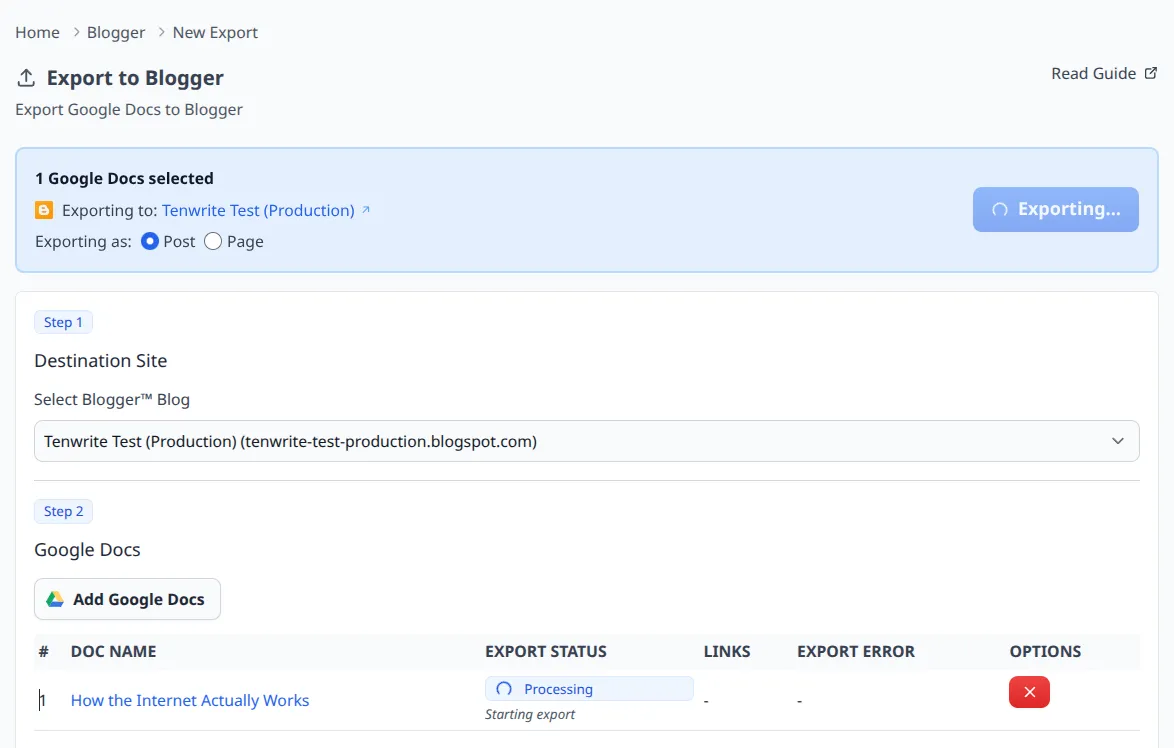
When a document finishes successfully, Tenwrite shows a toast notification and adds Edit and Preview links to that row.
Troubleshooting
Section titled “Troubleshooting”No blogs appear in the destination dropdown
Section titled “No blogs appear in the destination dropdown”Go to Blogger > My Sites and confirm your blogs are showing up. If you haven’t connected Blogger yet, follow How to Connect Your Blogger Blogs to Tenwrite. If you just created a new blog, wait a few minutes and refresh the page.
Google re-authorization required
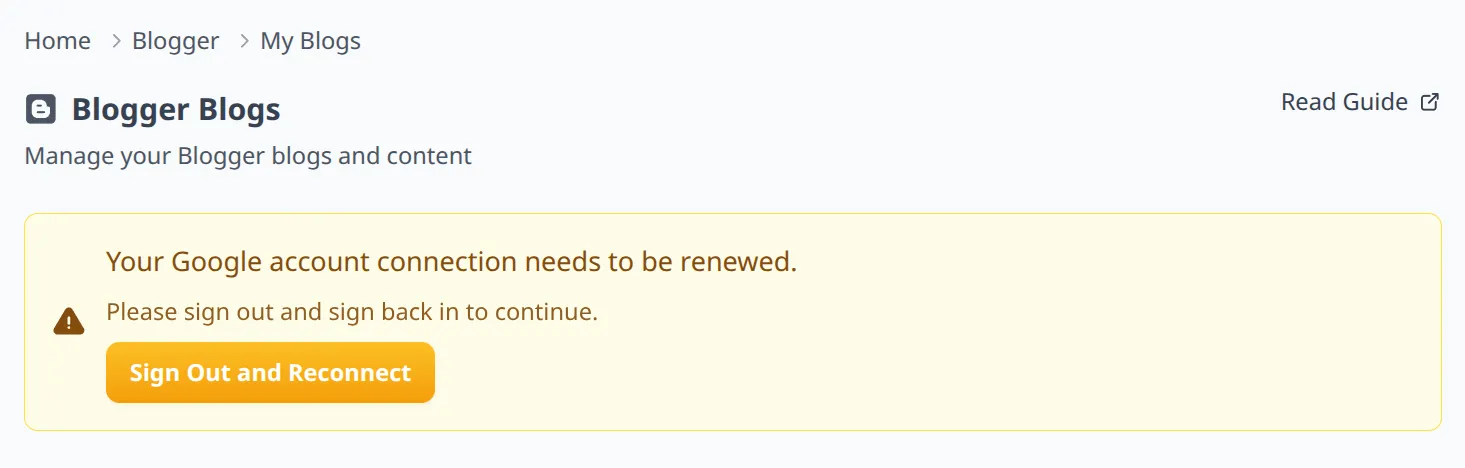
Section titled “Google re-authorization required”If Tenwrite shows a Google account warning, your session permissions may have expired. Sign out and sign back in with the Google account that owns the Blogger blog.
A file I selected isn’t a Google Doc
Section titled “A file I selected isn’t a Google Doc”Google Docs and Word .docx files are supported. For a different format, convert it to Google Docs before selecting it. Direct frontmatter editing requires a native Google Doc.
Some documents failed
Section titled “Some documents failed”Check the error message shown in the row. Common causes are large documents, temporary network issues, or invalid post settings. Try exporting failed items as a smaller batch.
A scheduled post didn’t publish
Section titled “A scheduled post didn’t publish”Make sure Status is set to Scheduled and the Publish Date is set to a time in the future. Check Blogger after the scheduled time has passed.
Related Guides
Section titled “Related Guides”If you’re still stuck, email support@tenwrite.com with the steps you took, the error message, and your blog URL.
Tenwrite is an independent product not affiliated with or endorsed by Google LLC, Blogger, or WordPress Foundation. Google Docs, Gmail, Google Workspace are trademarks of Google LLC. WordPress is a trademark of the WordPress Foundation.