How to auto-publish content from Google Drive to WordPress & Blogger
Tenwrite is a Google Docs add-on that lets you publish your content from Google Docs to WordPress & Blogger (Blogspot) in a few clicks.
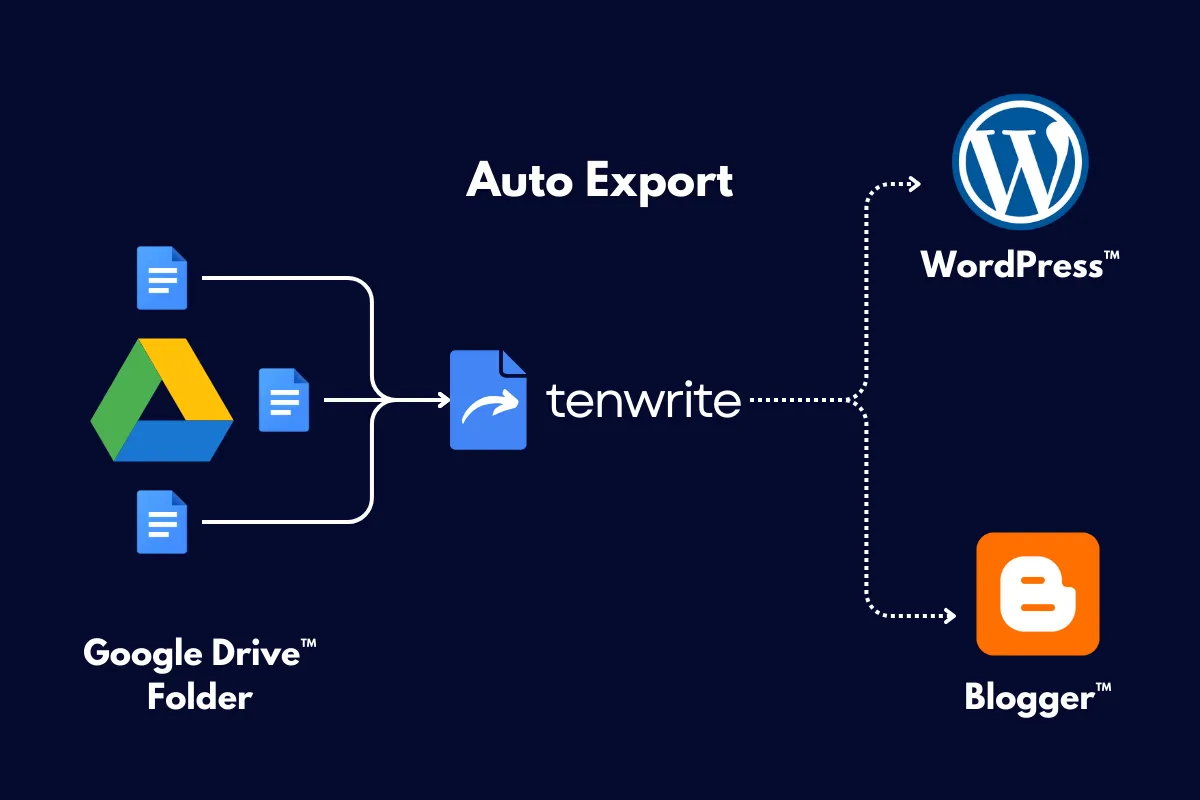
Tenwrite add-on can automatically export your Google Docs from Google Drive to your WordPress & Blogger (Blogspot) blogs at regular interval. Using this method, you can make sure that your posts are updated automatically whenever you make any changes to your Google Docs content.
A picture is worth a thousand words.
Prerequisites
Before you begin, make sure to meet the following requirements:
- Install the Tenwrite add-on: You need to have the Tenwrite add-on installed in Google Docs. Read this guide to install the add-on if you’ve not done already.
- Add Your Blog: You need to have one or more WordPress or Blogger (Blogspot) blogs added. If you are using Blogger, make sure that you have at least one blog in your Blogger account. If you are on WordPress, make sure that you have connected your WordPress site in the add-on.
Step-by-Step Guide
Follow the below steps to setup Google Drive automation.
1. Open Google Drive
Ensure you are signed in to your Google account. Open Google Drive in your web browser (e.g. Google Chrome, Firebase, Safari etc.).
2. Prepare a Folder in Google Drive
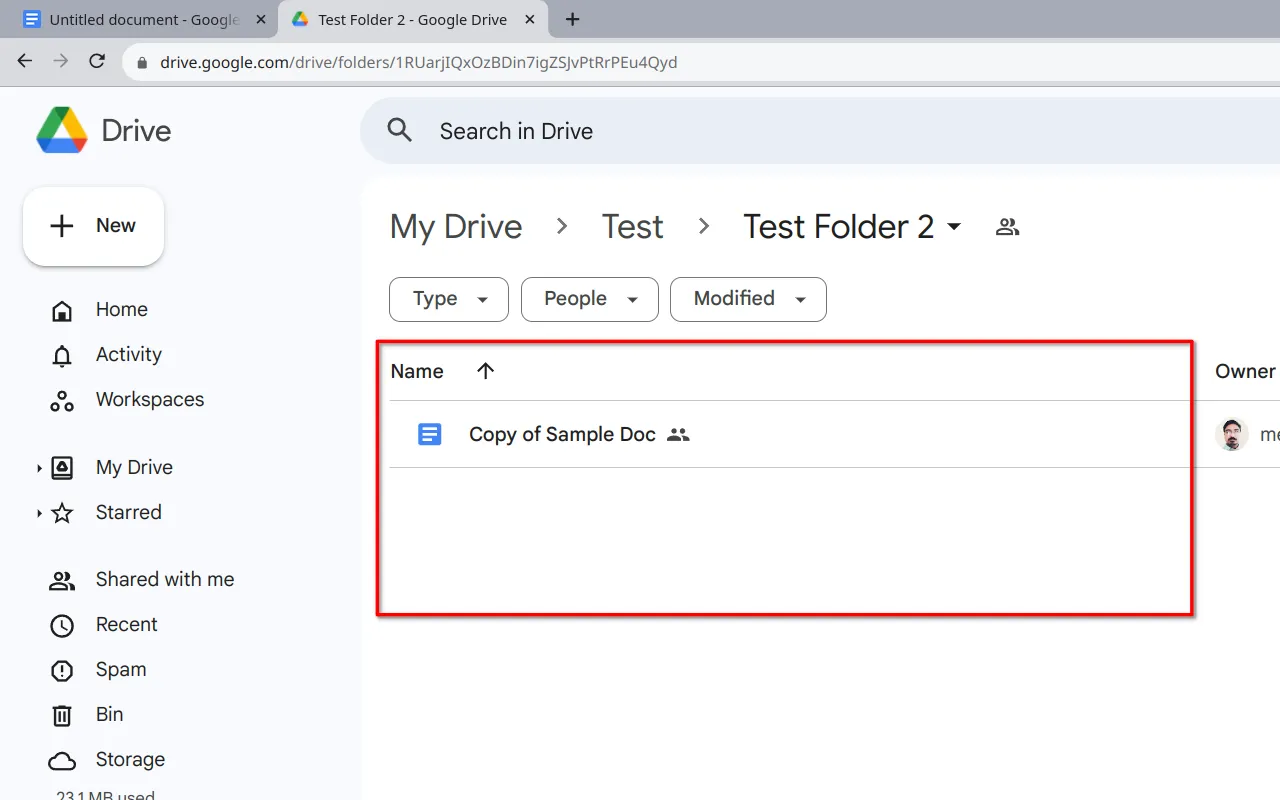
You can either use an existing Google Drive folder or create a new dedicated folder in Google Drive.
Once you have a Drive folder, copy or move your required Google Docs files to this folder.
From now onwards, you can directly create your new Google Docs files inside this folder or create the Google Docs in separate folder and move them once they are ready to publish.
3. Share the Folder
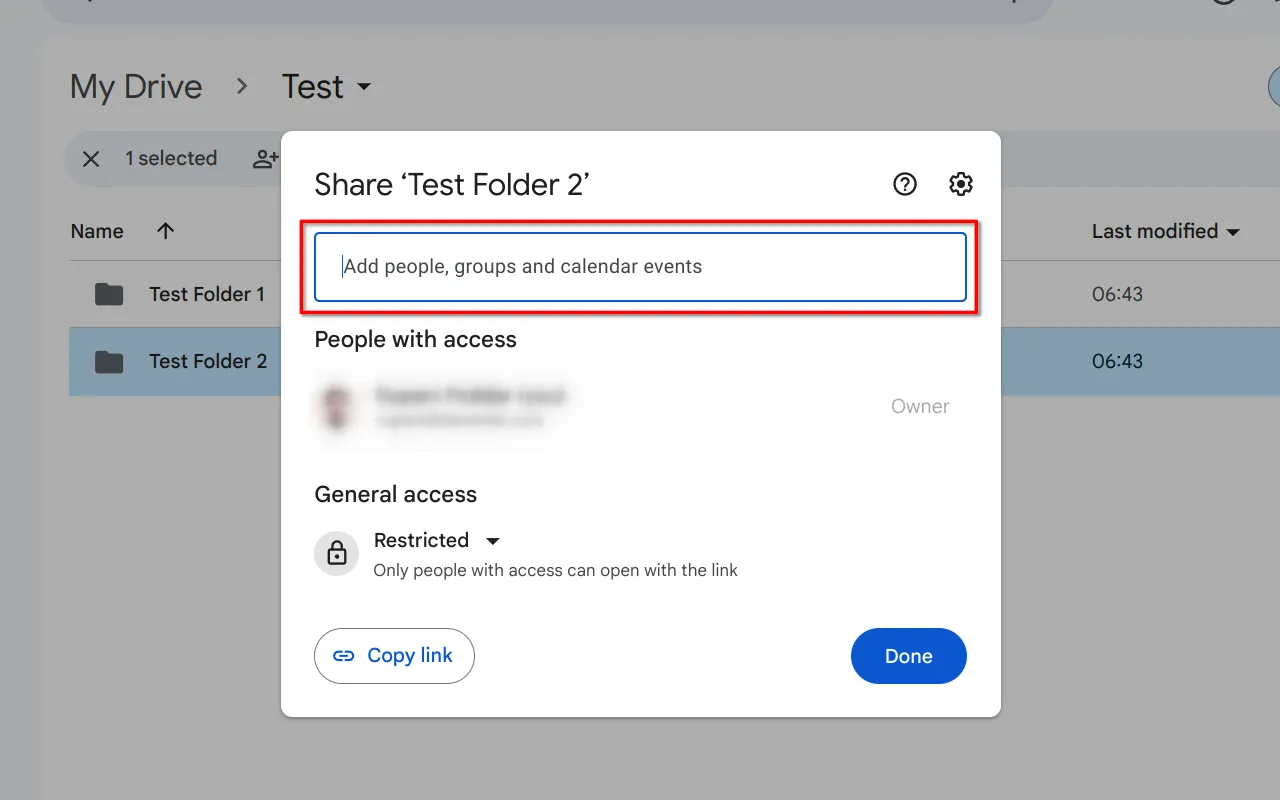
You need to share the Google Drive folder with the following special account:
drive-robot@tenwrite-gcp.iam.gserviceaccount.com
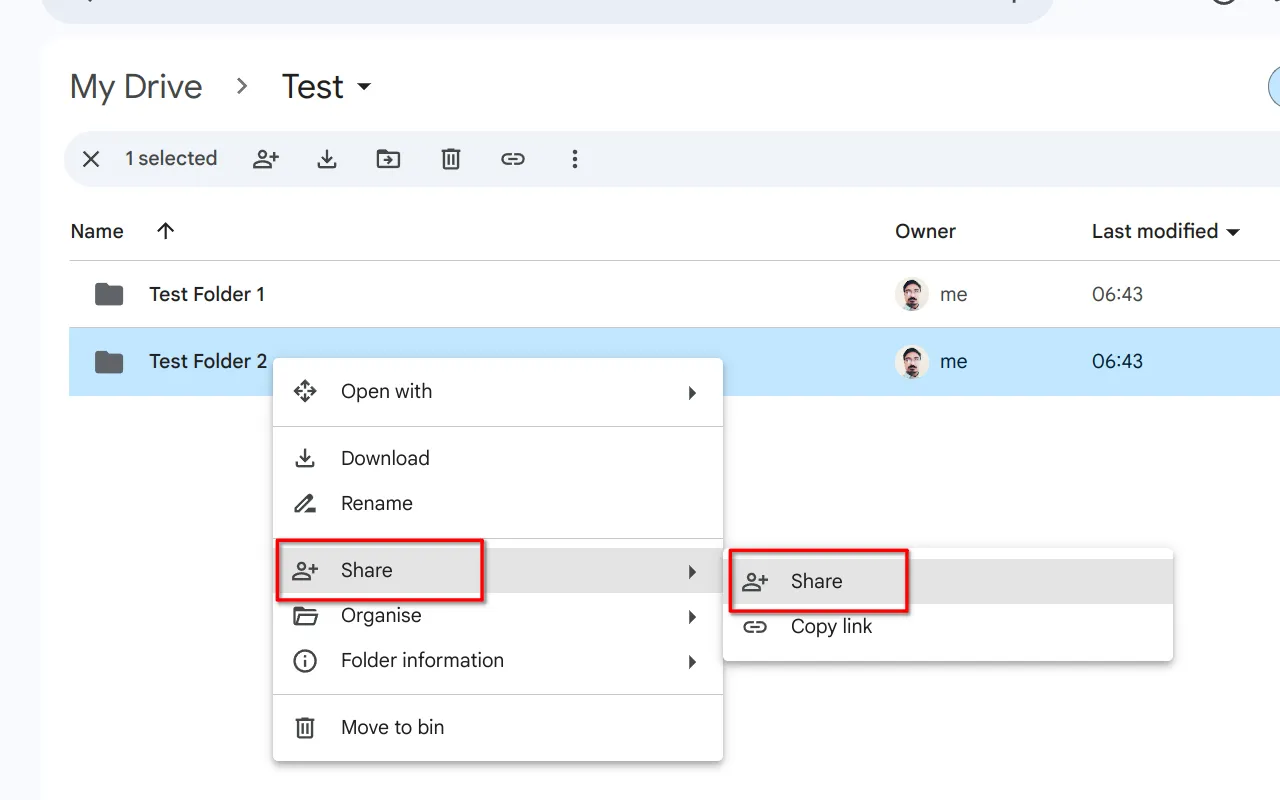
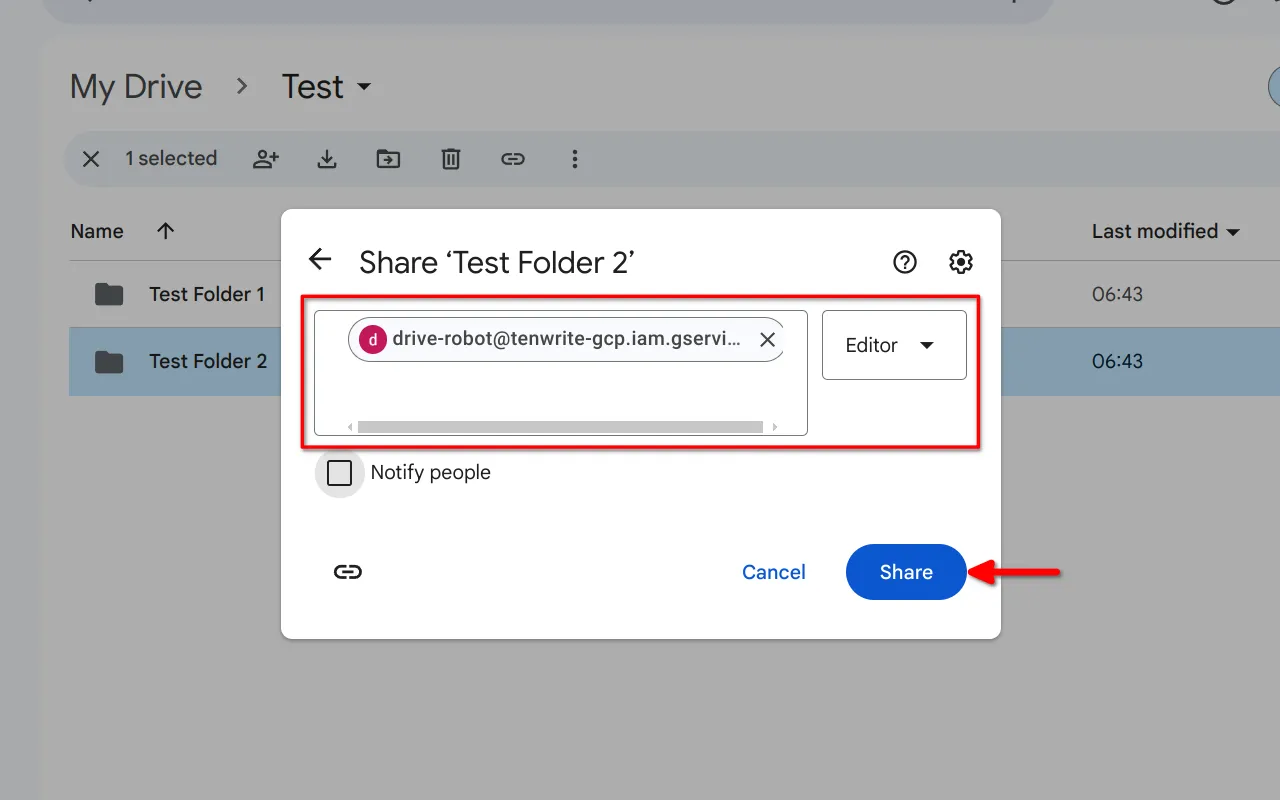
Right click on the Google Drive folder, select Share > Share.
In the input box, enter drive-robot@tenwrite-gcp.iam.gserviceaccount.com and click on Share button.
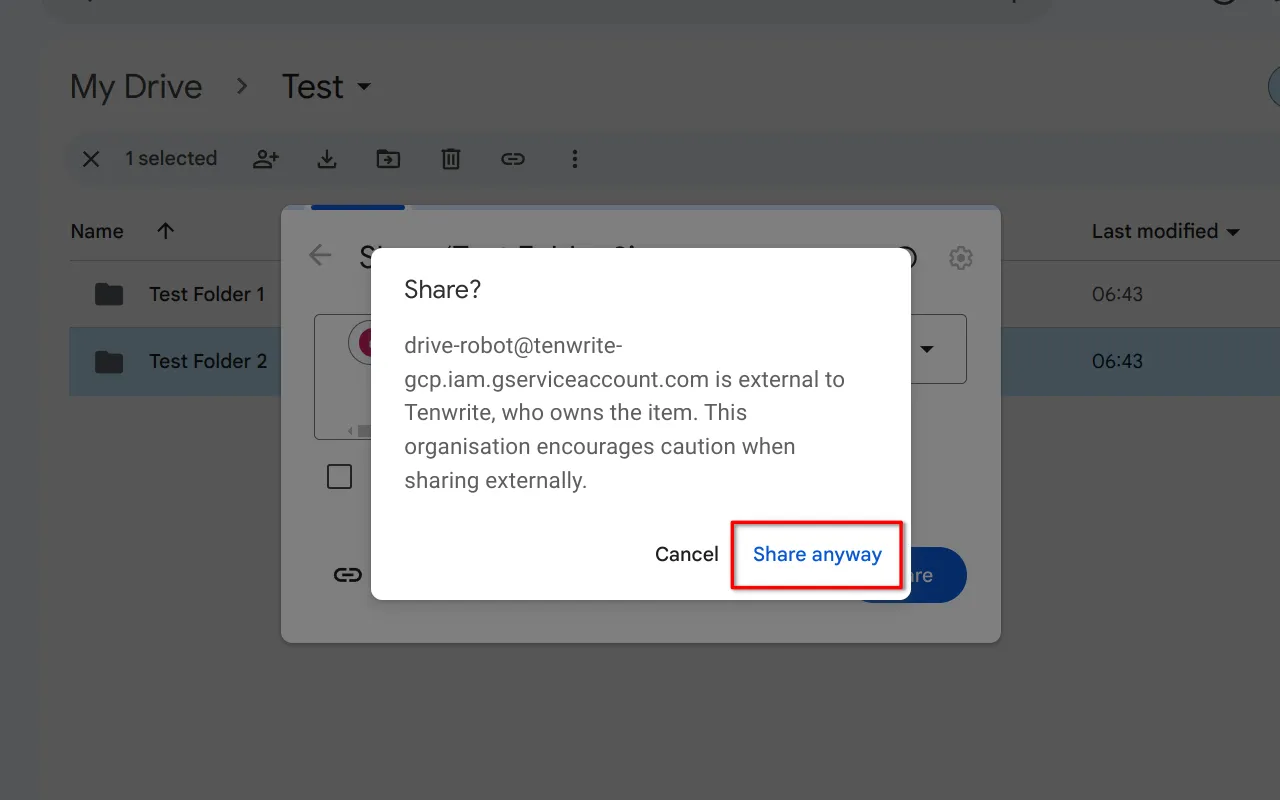
Click on Share anyways.
4. Copy the folder link
You can copy the folder link in two ways:
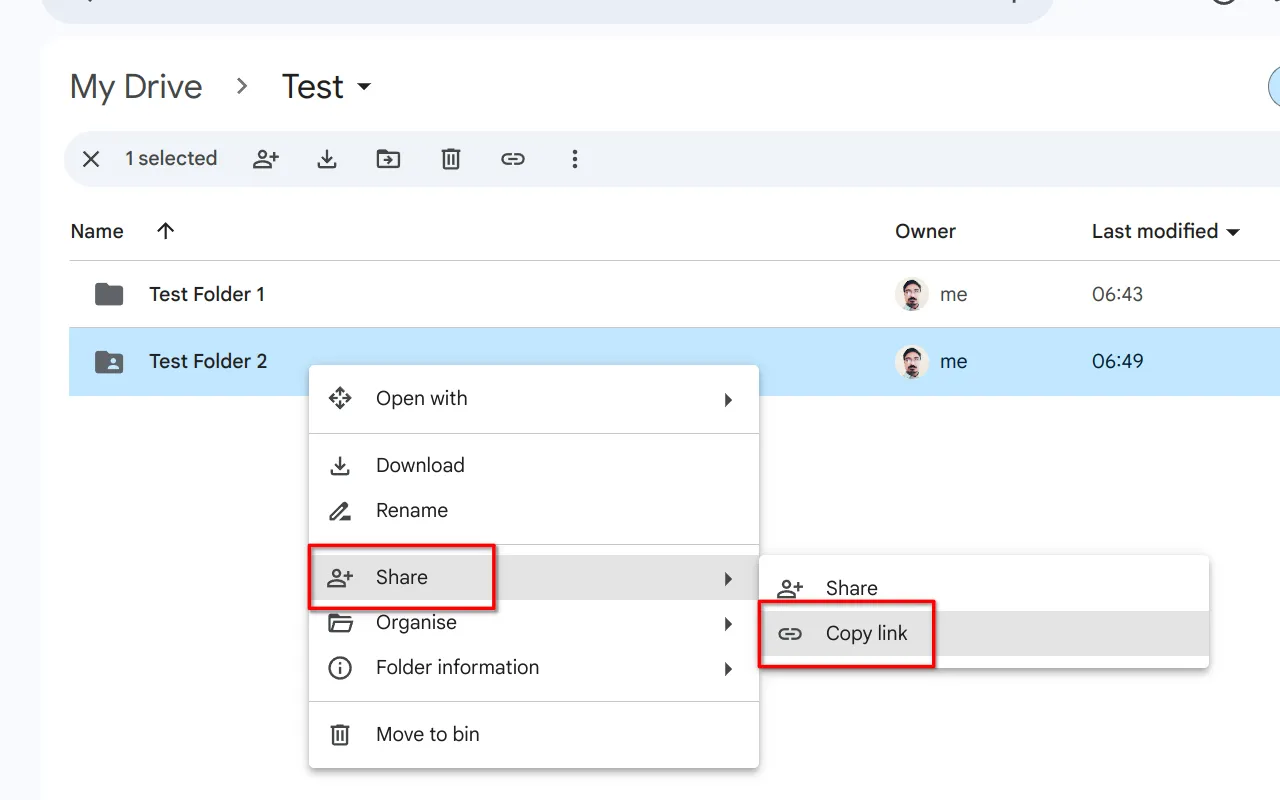
Right click on the folder, select Share > Copy link.
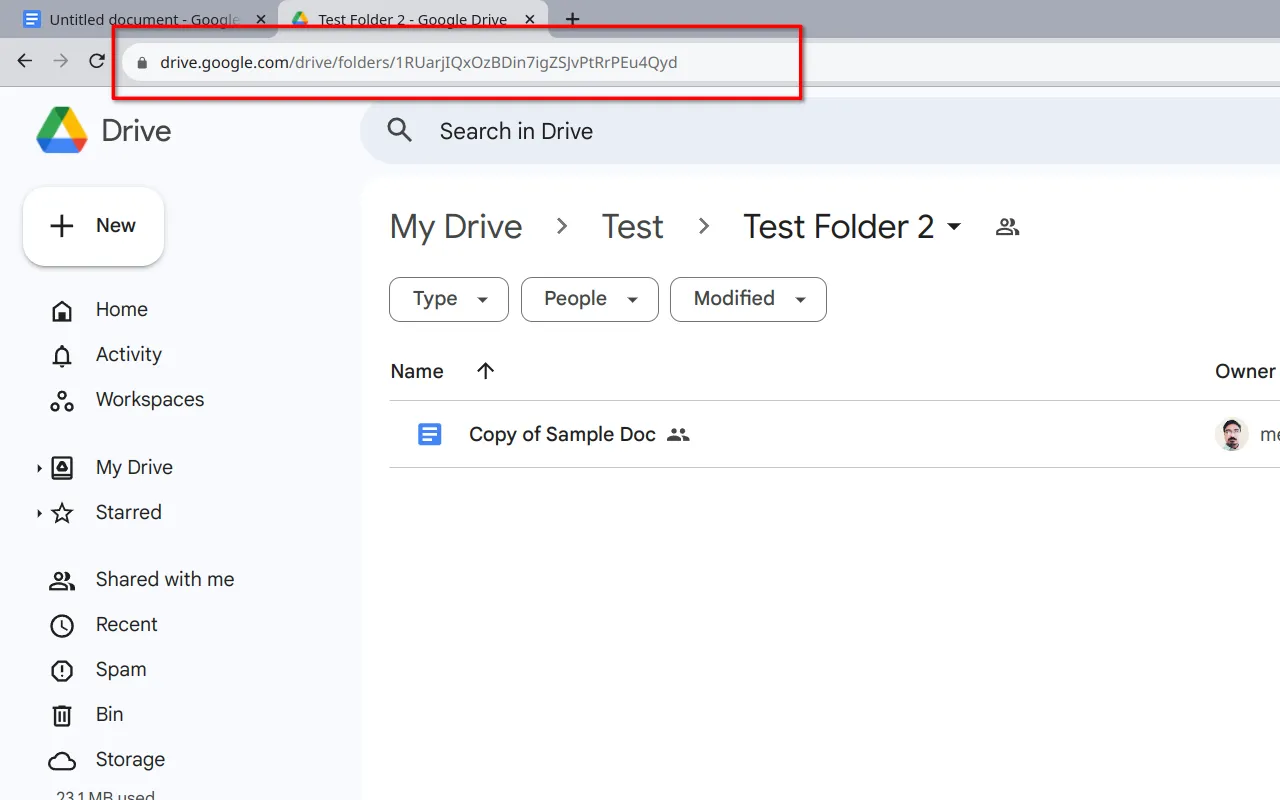
Or, go inside the folder and copy the website address.
5. Launch the Tenwrite Addon in Google Docs
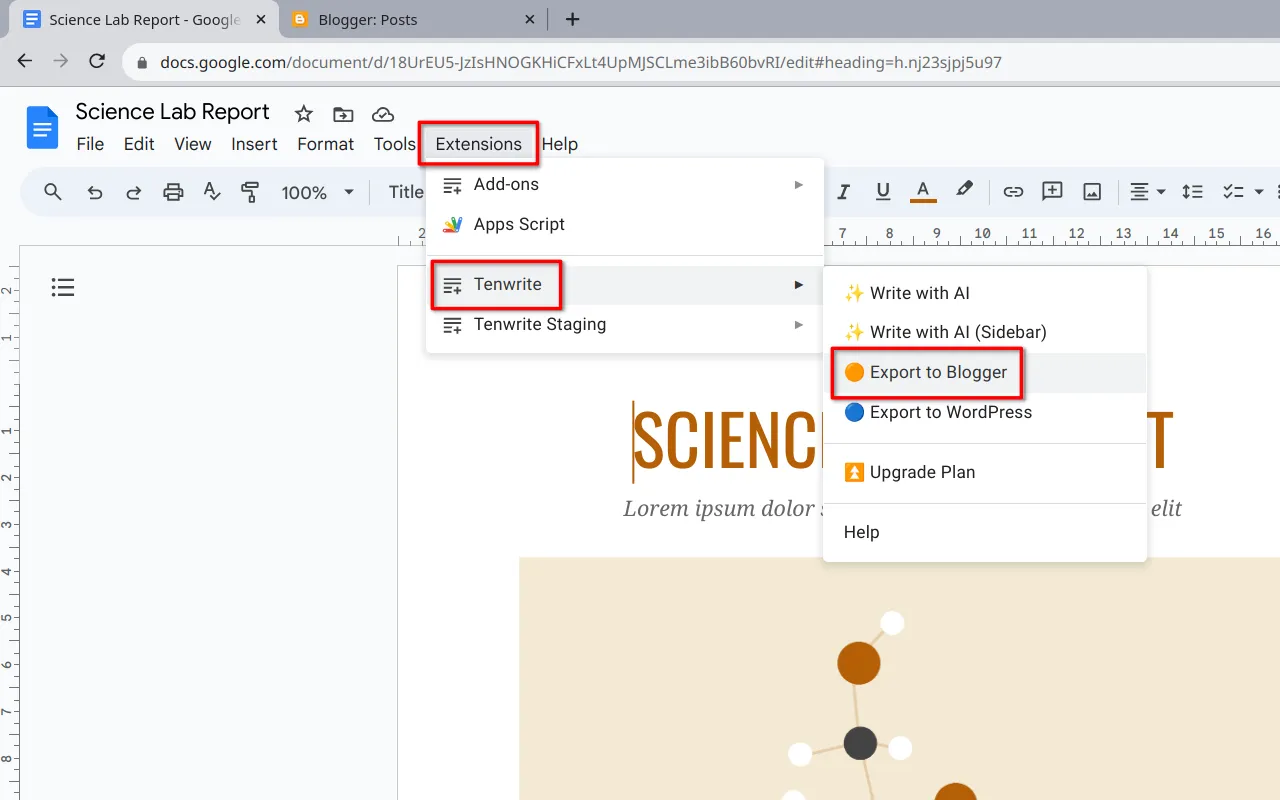
Go to Google Docs. From the top menu, click on Extensions> Tenwrite > Export to Blogger or Export to WordPress.
6. Configure automation
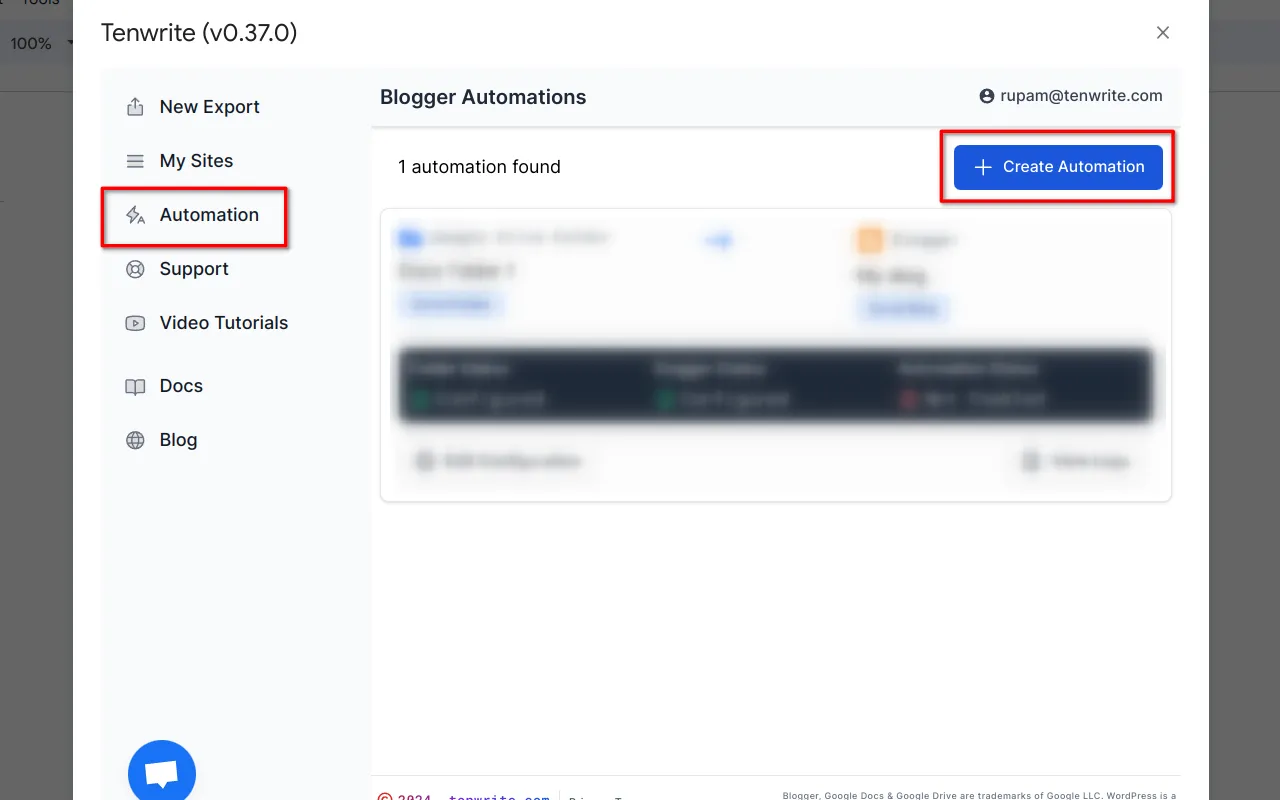
Go to Automations tab and click on Create Automation button.
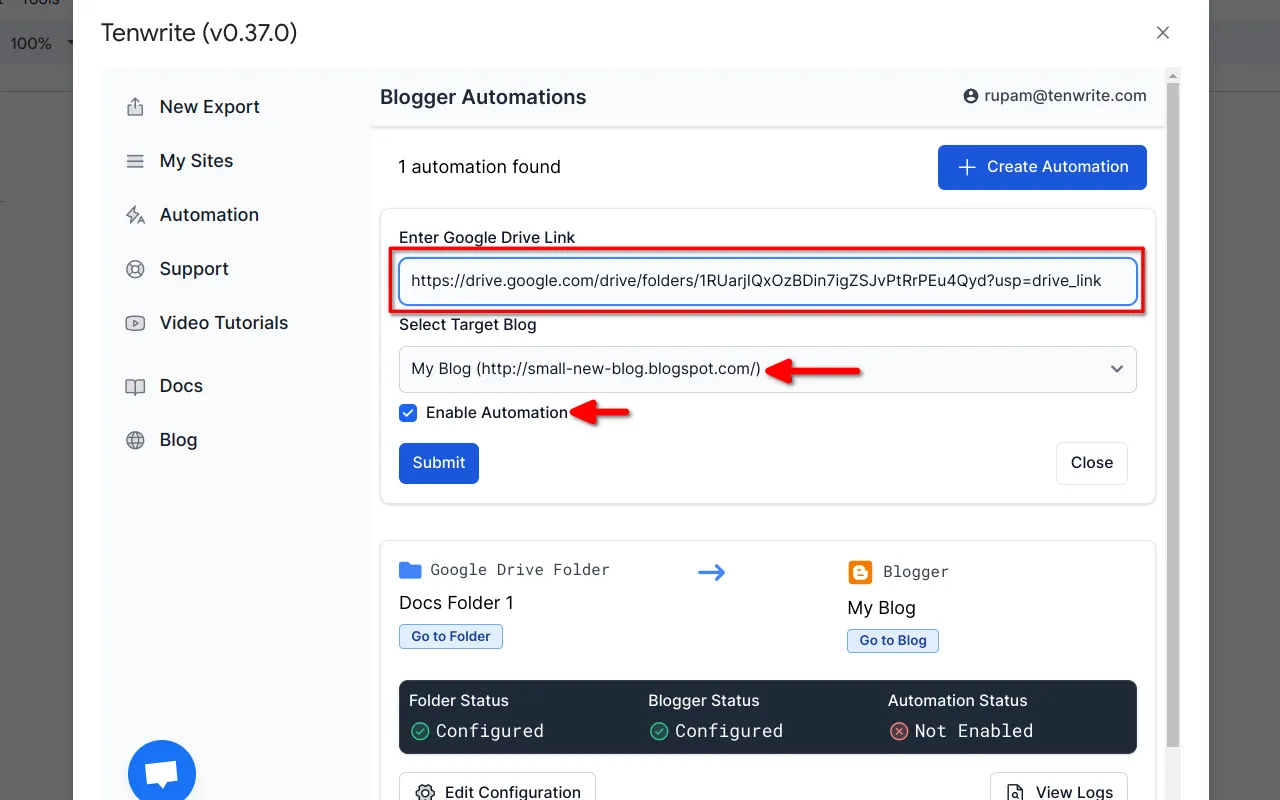
A form will open. In the form, enter the Google Drive™ folder link that you copied earlier.
Select the Target blog where the Google Docs would be exported automatically.
Enable the checkbox for Enable Automation.
Finally, click on Submit button.
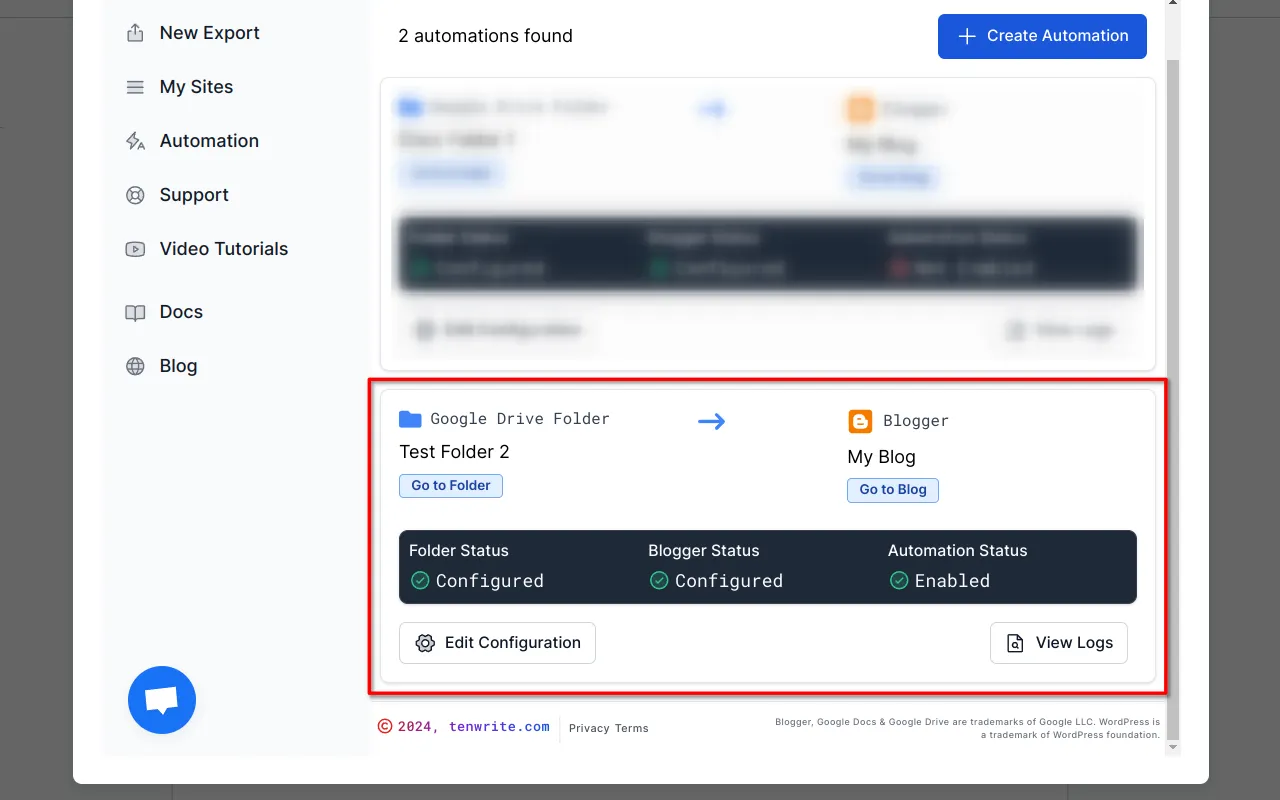
Once configured, you can see the status.
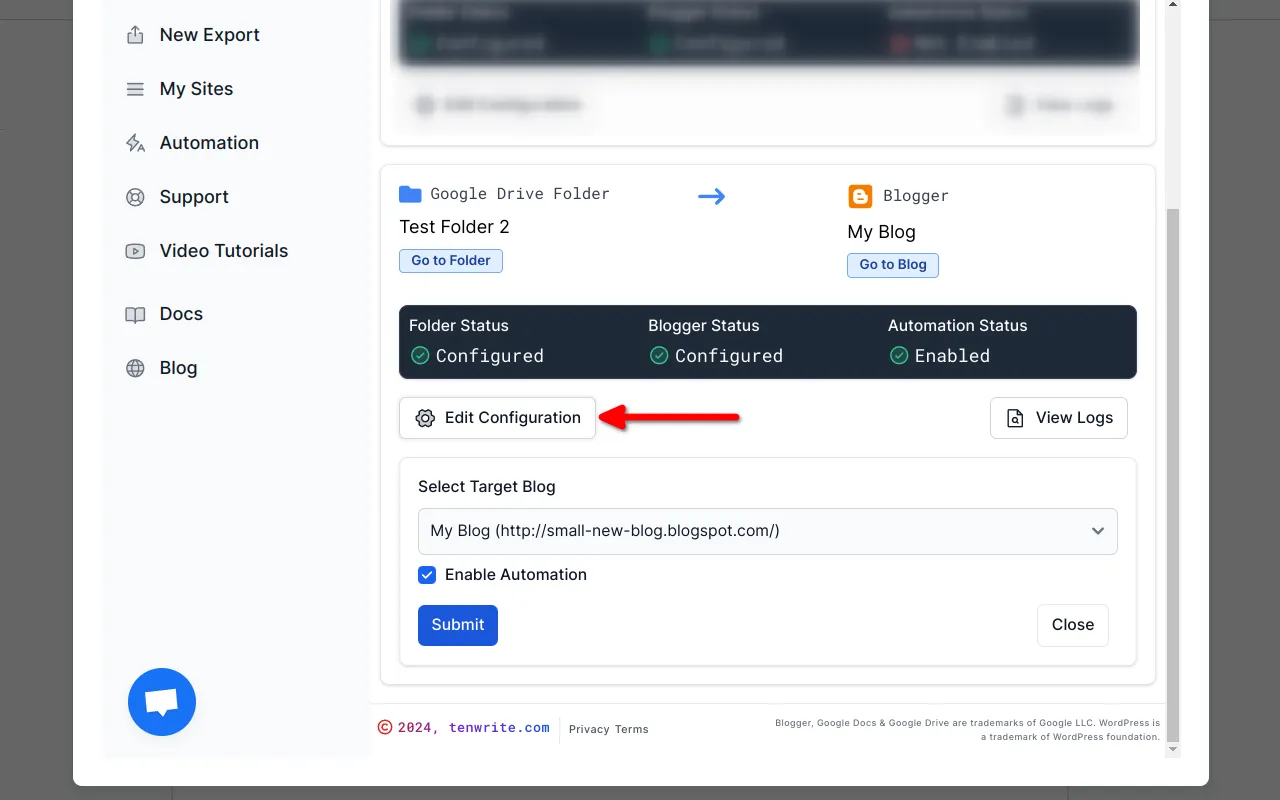
7. Edit automation configuration
At any time, you can click on Edit Configuration button to do the following:
- Enable or disable the automation.
- Change the target blog.
Frequently Asked Questions
1. How does the Google Drive folder automation work ?
Once you configure the automation on a Google Drive folder, the Tenwrite add-on will scan your Google Drive folder several times per day. As soon as the add-on finds a new Google Doc file or detect any changes to the existing docs, it will automatically export those to your specified Blogger or WordPress site.
2. How often does the add-on scan the Google Drive folder ?
During beta period, the scanning happens once every 3 hours.
Tenwrite add-on can scan as frequent as once-every-5-minutes. Contact us if you have any special requirements.
3. How to update an existing post that was exported using automation ?
Just update your Google Doc content, the next time Tenwrite add-on scans the folder, it will detect the change and will update the existing post in Blogger or WordPress. It will not create a new post.
Conclusion
Congratulations 🚀. You’ve successfully configured your first Google Drive folder automation with Tenwrite.
If you faced any issues or need any help, please contact us at support@tenwrite.com, we’re help to help!
